A Christmas Sponge: an Orange Upside Down Cake

This looked so fabulous and fancy in the magazine. And it uses candied oranges which is reminiscent of the candied orange peels my mother used to make. I made those a while back and you can read about that adventure here. The ingredients are simple enough. The time consuming part is poaching the orange slices in simple syrup to take away some of the bitterness. I have a lot of hopes while making this. And doubts.

I spent one evening preparing the orange slices. Scrub 4 navel oranges and then slice thin, 1/8-1/4 inch thick. Place these in a wide skillet or pan and cover with water. Bring to a boil and simmer one minute. If left too long the slices will start to break a little. Drain and set aside momentarily. Bring 3 cups water and 3 cups sugar to a boil in that pan and stir occasionally until sugar is dissolved. Then return orange slices to the pan. Slices must be put gently in the sugar water or they will break apart. Let this gently simmer for 2 1/2 hours, occasionally spooning the syrup over the oranges. Let cool in pan. At this point I stored these in the refrigerator covering the pan with its lid.

Two days later I am ready to make the cake. This is a sponge cake. I have only ever been successful at making a sponge cake once in my life! But I go for it anyway. Only afterward did it occur to me that I could have just made a butter cake which I have very much more success with.

IMG_0738

First, arrange the orange slices in a greased 9-inch round pan. I also added parchment paper to be sure it turned out of the pan okay. Additionally, the recipe said to drain the slices on paper towels and pat dry. Well…I forgot to do this. But I proceed.

  • 1 tablespoon butter, melted and cooled
  • 2/3 cup all-purpose flour
  • 1/4 teaspoon salt
  • 3 large eggs, warmed in hot tap water for five minutes
  • 1/2 cup sugar
  • 2 teaspoons freshly grated orange zest (about one orange’ worth)
  • 1 teaspoon vanilla extract

Preheat oven to 350 degrees F. In mixing bowl, beat eggs and sugar on low until blended and then on high 8-10 minutes until pale and thick and leaves a ribbon trail when the beater is lifted. I used the whisk attachment for this; not sure if that was the right thing to do. Where is Mom when you need her? I know she is up in heaven looking down and laughing at me! Merry Celestial Christmas Mom and Dad!

Then whisk in the orange zest and vanilla. Sift half the flour/salt mixture onto the batter and carefully fold this in. Repeat with the remaining flour. Then fold in the melted butter. So far, so good. Scrape this into the prepared pan and spread to edges to cover all the orange slices. Now bake this for 25-30 minutes until springs back when lightly touched and a toothpick comes out of the center clean. My cake took 33 minutes. Run knife around edge of cake and let cool in pan 10 minutes. Turn out onto cake plate.

IMG_0739
Very pretty!

First thing to notice is that they syrup from the orange slices has been absorbed into the cake. The second thing is after a few minutes on the cake plate the middle sank. Just a little bit, but still. Hmm? What is this about?

So now I am contemplating what to do. I could make a new cake and remove all these lovely orange slices and bake them upside down with a butter cake. I could spend 2 1/2 hours poaching more orange slices and make this again with a butter cake recipe. Or I could hope that there will be more than one dessert for Christmas Eve. And that this actually will be just fine, even though I cannot test it first. It is to be served with a chocolate orange sauce which might cover all ills. What to do?

Not content to leave well enough alone I decide to make a back-up cake! This one will have fresh orange slices in the manner of pineapple upside down cake. And will be a plain butter cake from my standard Betty Crocker Cookbook. I peel these oranges before slicing them. Melt 1/4 cup butter in the cake pan and sprinkle 1/3 cup brown sugar on the butter and then arrange orange slices. Make a batter for a single layer cake, 9-inches. Bake 45 minutes.

IMG_0742 1
I sprinkled it with red sugar to be festive!

I take both for the Christmas Eve feast. The pretty cake is pretty and smells quite orange-y. It is impossible to slice effectively. And there is virtually no cake under the center for at least a 3-inch diameter. The candied orange slices are sickly sweet, almost inedibly so. The cake that is there at the edges is okay, but this did not serve as a slice of cake. And was not worthy of the chocolate orange sauce I made to go with. An epic fail!

The back up cake was ugly. Especially ugly when displayed next to the first cake. The cake was nice, a moist ordinary butter cake. Orange slices because of their fibers do not make a good cake fruit. One should stick to apples, pineapple, pears, and the like.

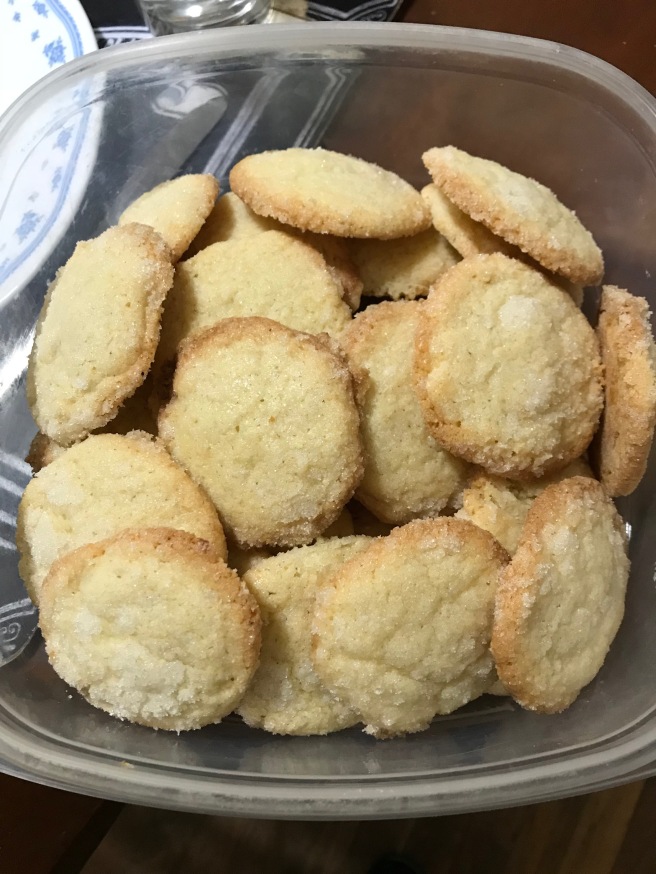
Luckily a family member had made a nice apple pie and there were plenty of Christmas cookies for dessert…and bourbon…and wine. Did I mention there was bourbon? And everyone was full from the wonderful prime rib dinner.

Merry Christmas to all who celebrate! Happy Winter holidays to others! Hanukkah is past. Kwanzaa has just begun. And may we all have a blessed New Year in 2018!


Advertisement

Provencal Chicken

I have completely adapted a recipe that called itself Provencal Chicken Saute. It did not use Herbs de Provence so I don’t know why it called itself Provencal. What follows is my version. And it is not a saute, but a bake.

IMG_0734
Ready to go back into the oven for the finishing touch
  • 8-10 chicken thighs, skin off
  • a bit of olive oil
  • 1/2 large onion, diced
  • 2-3 minced cloves garlic
  • 14.5 ounce can diced tomatoes
  • Herbs de Provence
  • 1/4 cup chicken broth
  • 1 teaspoon dried basil
  • 1/4 cup sliced Kalamata olives

Spray a roasting pan and put in the chicken. Sprinkle this liberally with Herbs de Provence. Bake in oven for 30 minutes at 350 degrees F.

Meanwhile put a bit of olive oil in a skillet. Heat on medium and add the garlic and diced onion. Stir and cook for a few minutes until fragrant. Add the can of tomatoes and basil and broth. Bring this to boil and let reduce slightly. This took about 5-8 minutes or so. Remove from heat and stir in the olives. Spoon this on top of the chicken at the 30 minute bake mark. Put back in oven and bake another 10 minutes.

I served this with egg noodles and a salad. The olives give this a nice saltiness and the tomatoes give a bit of sweetness.

IMG_0737

Freezer Rolls

IMG_0726

I’ve been making freezer rolls. These were the dinner rolls for our Thanksgiving feast and the cinnamon rolls for Thanksgiving breakfast. Although I had read about these on the King Arthur Flour website here, I dug out my handy-dandy Fleischmann’s Yeast Bread booklet and used a recipe in it. This booklet is falling apart. My mom used this and gave it to me. The copyright is 1971. This recipe makes 4 dozen rolls. So I made 24 cinnamon rolls and 24 dinner rolls.

Pick your pans. I use a standard 9-inch x 13-inch baking pan for the cinnamon rolls. Except the picture shows a Christmas tree pan because these are for Christmas breakfast. The mini muffin pans are just to hold the rolls until they are frozen solid and then they can be popped out and put in a freezer bag. These should keep in the freezer for up to one month.

  • 5 1/2 to 6 1/2 cups all-purpose flour (on occasion I substitute 2 cups with whole wheat flour, regular or pastry)
  • 1/2 cup sugar
  • 1 1/2 teaspoons salt
  • 2 packages Active Dry Yeast OR 5 teaspoons Instant Yeast
  • 1 1/4 cups water
  • 1/2 cup milk (any type)
  • 1/3 cup butter
  • 2 eggs at room temperature

Combine water, milk, and butter. Heat to 120-130 degrees F. I most frequently do this is a 2-quart Pyrex measuring cup/bowl in the microwave for 2-3 minutes. Check after two.

In the bowl of your stand mixer combine 2 cups flour, sugar, salt and yeast. Whisk to mix thoroughly.

Gradually add the heated liquids to the flour mixing a you do and then beat on medium speed for 2 minutes. Scrape bowl occasionally. Add eggs and 1/2 cup flour and beat at high speed for 2 minutes. Scrape bowl and add enough flour to make a soft dough. Knead. I knead this with the bread hook for 5 minutes. By hand is 8-10. Turn out on lightly floured board or counter. Cover with plastic and a towel and let dough rest for 20 minutes.

Now shape your rolls. I cut the rested dough in half with a bench scraper and cover one half with the plastic while working with the other. For rolls, I gently pull this half into a log about 12 inches long. Then with the bench scraper I cut this into 24 pieces. I placed these into a greased mini-muffin pan. You could just set them on a baking sheet but wrap them well to freeze. The second half of the dough I roll out into a rectangle, maybe 14 inches by 11 inches? Spread this with 2 tablespoons of melted butter and sprinkle with 1/3 cup of cinnamon sugar. I placed these in the baking pan and then wrapped it with plastic wrap to freeze.

To bake, remove from freezer and place in greased pan. Set on counter and let thaw and rise for 2 hours or so until doubled. Bake at 350 degrees F for 15-20 minutes.

Truth be told, there are differences to the method of the Fleischmann’s booklet and King Arthur Flour. And it might make a difference:

  • KAF suggests using cooler liquids, not warm
  • KAF suggests not to let the dough rest before shaping

Their reasoning is to keep the yeast as dormant as possible so as not to be damaged during the freezing.

The batch of rolls I made for Thanksgiving I used Fleischmann’s recipe (as listed above) but KAF’s methodology. The dinner rolls rose nicely on the counter. The cinnamon rolls rose nicely in the refrigerator overnight. The batch you see in the picture for this blog I used the Fleischmann’s method. Thawing the rolls overnight in the fridge did not see a rise. They were soft and not frozen so additionally I put them on the stove (indirect heat) for 30 minutes before baking. They finally had a slight rise and did bake up nice and soft and tasty.

I think I will stick to the KAF method in the future. It results in a better risen roll. The thaw and rising have more eye appeal. The taste was not affected.


Chicken and Biscuits

IMG_0723

This is not my usual chicken pot pie. This was inspired by Colleen of Leen Cuisine. Should we call this chicken cobbler because of the biscuit topping? Maybe, maybe not.

I had thawed two chicken breasts and needed to cook them. However, I had not thawed the disk of pie dough nor did I think I had my frozen mixed vegetables which is my “go to” veggie filler for dinner dishes. When I got home after work I found that I did not have frozen mixed vegetables. I did, however, find the frozen peas that I had bought for our Thanksgiving feast but did not use.

Do you know there are women/cooks who do not use frozen vegetables? I am super impressed that they cook real vegetables for dinner every night. I don’t expect to live up to that standard.

  • 1 tablespoon butter and about that in olive oil, too
  • 1 can grand type biscuits
  • 2 chicken breasts, cut into bite-sized pieces
  • 4 medium carrots, peeled and cut into “pennies”
  • 1/2 large onion, diced small
  • 1/2 teaspoon garlic from jar
  • 1 cup frozen peas
  • 1 cup chicken broth
  • heaping tablespoon cornstarch
  • 1/2 cup shredded cheese
  • salt and pepper to taste

Start by putting a little oil or butter in the skillet to saute the garlic, onion, and carrots. Cook these for about 5-8 minutes, stirring occasionally. If you like additional spices, you would add them here. If, not just sprinkle on a little salt and pepper. Remove these vegetables to the baking dish or pie pan.

Preheat oven to 350 degrees F.

Add a little more oil to skillet and cook the chicken until no longer pink, maybe 5-6 minutes. Add a little of the broth to the pan and the vegetables, this time add the peas. Stir the cornstarch into the rest of the broth add to the skillet, and heat on high for a few minutes. Move this concoction from the skillet into the baking dish. Stir the cheese into this.

Remove the biscuits from their tube. And arrange artfully on top of the baking dish. Since all the ingredients are cooked it is just a matter of cooking the biscuits. Since the bottom of the biscuits are in the “stew” they will take a bit longer to cook than the directions on the tube.

I baked this for 20 minutes and then covered loosely with foil to keep warm in the oven while waiting for Hubby to come home. This dinner came together in less than an hour.

I served this with jarred pickled beets from an orchard in the Adirondacks. They did not disappoint! And the cucumber salad is similar to the salad Son made for Sister and me  when we visited him in Armenia. Thinly sliced cucumber and carrots, tomatoes, and green onions in a vinaigrette.

I had intended to make a green salad but the lettuce had gone rusty and was promptly added to the compost bucket. I like having a compost bucket. The service picks it up every other week. When I have to throw away food I know that it is being put to good use. With that, and our town recycling nearly everything in sight, our trash bin is getting emptier and emptier. Just my little part for the environment…I hope everyone can do a little something.


Chicken Cutlets with Herbes de Provence & Apple Compote

This is another recipe from Eating Well Magazine Winter 2003. I had all these ingredients and it is supposedly a meal made in 30 minutes. Well, it took me 40 minutes, and an additional 8-10 for the sides.

  • 2 apples, peeled and slice thin
  • 1 tablespoon freshly squeezed lemon juice
  • 1/2 teaspoon cinnamon
  • 3 teaspoons olive oil, divided (These are what the recipe calls for. My amounts were approximations because I do not take the time to measure out oil for adding to skillets for sauteing and the like.)
  • 3 teaspoons butter, divided (see above note)
  • 1 1/2 teaspoons Herbs de Provence
  • 1/2 teaspoon salt or to taste (see note above for salt and pepper as well)
  • 1/4 teaspoon freshly ground pepper
  • 1 1/2 pounds boneless skinless chicken breast; I had thawed four for this recipe and have no idea how much they actually weighed. Be sure to thaw the chicken!)
  • 1 cup chicken broth
  • 1 teaspoon freshly grated lemon peel

First make the apple compote: Take two apples, peel them, and slice thin. Put in a bowl and mix with the  lemon juice and cinnamon. I cooked this in a little oil and butter in my cast iron skillet. That took about 5 minutes to cook. Set aside and keep the compote warm. Add 5-7 minutes for peeling the apple and squeezing and zesting the lemon. And another 2 minutes for cleaning the skillet and finding a bowl to hold the compote.

Mix 1 teaspoon of herbs with the salt and pepper. This does not look like enough seasoning but it is. Place chicken between two pieces of plastic wrap and pound with mallet until 1/2-inch thick. This went rather smoothly. I got to use the meat mallet Hubby had found that is all of one piece. It just won’t do to be pounding meat and have the head of the mallet go flying across the kitchen! Anyway, sprinkle both sides of the flattened chicken with the seasoning mixture.

Heat the remaining butter and oil in the skillet. Heat over high heat. Add half the chicken and cook until no longer pink 2-3 minutes per side. Remove to platter and repeat with the other half of the chicken. Here is when I begin to get the idea that perhaps this recipe was made for 6 chicken breasts…did say it served six. Too bad, for Hubby and me I have the four. When chicken is done, remove to platter to keep warm.

Add broth, lemon zest, and remaining herbs de Provence to the skillet. Cook stirring to scrape up any browned bits from the bottom of the skillet. Bring to boil and cook for about 3 minutes until slightly reduced. I kept cooking a few more minutes because it did not look reduced to me. Spoon sauce over chicken and serve with the apple compote.


IMG_0712

IMG_0714The magazine suggested serving this with orzo and green beans. I served it with leftover sweet potato mash and cooked mixed vegetables from frozen. If one were to make the orzo and beans this meal would take longer. The entire time I was focused on the cooking the chicken and compote. Next time around, I won’t have to keep referring to the recipe and that may shave 5 minutes or so from the prep and cook time.

This is a tasty chicken dish. I will make this again. I may leave out the apple compote and make a savory lemon sauce/gravy to pour over, or maybe an orange sauce! I think orange would complement the Herbs de Provence very nicely.


Spinach, Sausages, and Potatoes

I have collected various cooking/food magazines over the years. While looking for my cookie recipes I found some Eating Well magazines from 2002 and 2003. I have a memory of the time reading these and thinking the recipes were too exotic or different. But when glancing through them now I find the recipes intriguing and simple enough. They are different from the usual Midwestern fare of my upbringing, but now in my cooking that is a good thing. Back then I read the articles for the health and wellness; now I will try out some of the recipes.

This recipe was touted as a warm salad along with other recipes for adding greens to one’s diet. It describes a variety of winter greens and how to cook them. This one was named Warm Salad of Greens, Italian Sausage & Potatoes. And it’s not like I had all these ingredients sitting around my kitchen. But as many of you do, I read the recipe for the idea and the way the ingredients are combined and cooked and put together. And as I was reading this one I thought about frozen spinach (always in my freezer), the venison sausage from my son-in-law’s first buck, and the white potatoes in the pantry. Voila, a recipe is born!

The original recipe calls for kale. I have never cooked kale, nor eaten it to my knowledge. I have heard, who knows where, that it is bitter and tough if not cooked right. Here’s what I used:

  • 4 links of venison sausage, most likely a pound or more
  • 3 medium sized potatoes, washed and diced
  • 1 or 2 cups frozen spinach (I just poured from the bag)
  • 2 teaspoons fennel seeds
  • 2 tablespoons olive oil
  • 2 tablespoons red wine vinegar
  • 1/2 teaspoon minced garlic from a jar
  • pinch of salt
  • fresh ground pepper

First put the potatoes in a pot of water and bring to boil. While waiting for this, remove skins from sausages. First actually I boiled the sausages for 10 minutes in a pot of water like my son-in-law instructed. So I am removing the skins from these cooked sausages.

Put the fennel seeds in a skillet and cook with the sausages. I had to improvise here because my sausages were already cooked. I added an additional tablespoon of oil to this skillet and sauteed the sausage with the fennel seeds. The seeds did indeed stick to the sausages as reported in the original recipe. When done, I cut the sausages into 1/2 inch thick slices.

When the potato pot comes to a boil, add the spinach and cook until potatoes are tender, about 10 minutes. Drain and add to the skillet with the sausages. Whisk the oil, vinegar, garlic, and salt and pepper in a small bowl. Pour over the sausage-potato mixture and toss to blend. Dinner is served.

IMG_0715

The beauty of this recipe is that it also make a fabulous base for soup for the leftovers. Venison has a rich taste so a little goes a long way. To make soup I sauteed a diced onion and 1 cup frozen mixed vegetables in a tablespoon of oil in the dutch oven. After about 5 minutes I added a can of diced tomatoes and two tablespoons of pesto. The pesto was in place of sauteing garlic with the onion. I had one last square of homemade pesto in my freezer. Now add 3 cups of broth. I used chicken or turkey broth that also was homemade in my freezer. Bring to a boil, reduce heat and add the leftover sausage-potato mixture and a can of cannellini beans, drained. Simmer until heated through.

IMG_0718

This is a nice rich soup/stew. We had some for supper, and I have leftovers to bring to work for my lunches.


Cook’s Cookies: Gingered Sugar

I have forsaken Sister’s tried and true sugar cookie recipe for the magazine’s. Cook’s Illustrated Holiday 2007 boasts The Best Sugar Cookies. Well, I thought I would see about that. They had a gingered option and because I love all things ginger, I made that version. I always have fresh ginger root in my freezer.

  • 2 cups all-purpose flour (someday I am going to make everything with whole wheat pastry flour but not today)
  • 1/2 teaspoon baking powder
  • 1/4 teaspoon salt
  • 16 tablespoons unsalted butter, softened (I always use unsalted butter; I suppose if you use salted butter you could leave out the salt, but I am not certain of that.)
  • 1 cup sugar, plus 1/2 cup for rolling dough
  • 1 tablespoon light brown sugar
  • 1 large egg
  • 1 1/2 teaspoons vanilla

And for the gingered version:

  • in food processor, process 1 teaspoon (I used 1 inch fresh ginger root, peeled and minced) with the 1/2 cup sugar for rolling the dough for about 10-20 seconds. place this in a shallow bowl
  • add 2 tablespoons chopped crystallized ginger to the sugar along with the eggs and vanilla

Preheat oven to 375 degrees F. Line baking sheets with parchment paper.

Whisk dry ingredients together in medium bowl, set aside. In bowl of electric mixer, beat butter, 1 cup sugar and brown sugar until light and fluffy about 3 minutes. Add egg, vanilla, and crystallized ginger and beet about 30 seconds until combined. Add dry ingredients and mix until just combined; scrape down sides of bowl as needed.

Form dough into 1 to 1 1/2 inch balls and roll in the ginger sugar. The sugar was moist probably because my ginger was from the freezer. This actually helped it stick to the dough nicely. Place 2 inches apart on lined baking pans. Now butter a bottom of a drinking glass and dip in the gingered sugar and flatten each cookie to 3/4 inch thick.

Bake 15 minutes. Edges will be lightly browned. These spread some in the baking. My second pan kind of spread together but not too much. That doesn’t affect the taste.

IMG_0713

These have a nice sugary crunch on the outside and are slightly chewy on the inside. The ginger is very subtle. I like them and so does Hubby. And we tend to think of sugar cookies as rather bland, but not these.