Fruit Cake anyone?


Ummm, no thank you!

This is a common response to the offer of fruitcake. In America we think of fruitcake at Christmas time. In Canada it is often called Christmas Cake. Wikipedia tells us some of this history: https://en.wikipedia.org/wiki/Fruitcake. In the Bahamas all the nuts and candied fruits are soaked in rum even before added to the cake. ”. Fruitcake has been the butt of jokes for many years.

I confess I like fruit cake, the thick candied citron and nut laden confection. I like it in small amounts. It does not have the texture of what we Americans call “cake. The fruitcake my Mom made had no spirits in it, she being a tee-totaler. But supposedly a fruit cake containing alcohol can last forever!

I don’t make or buy fruitcake. No one would eat it and I do not want one that lasts a lifetime. Years ago a friend of mine gave me a recipe for fruit laden banana bread.magibreadandorangepeels 001


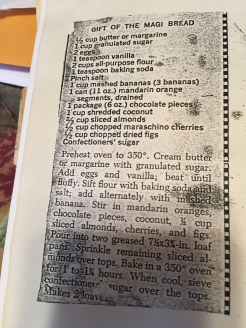
She asked me to make this for a party she was hosting at her home. It contains oranges, maraschino cherries and chocolate chips among others. I have never added the figs which are in the original recipe. I use sliced almonds instead of slivered because I like the texture better. This is more of a fruit bread instead of fruit cake.

This is my version:magibreadandorangepeels 002

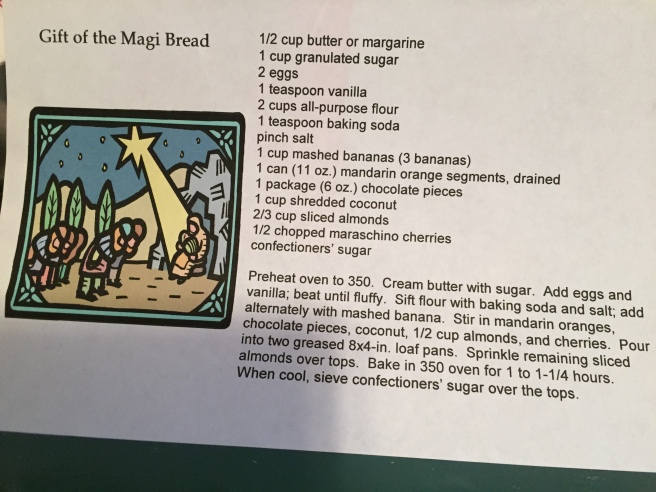
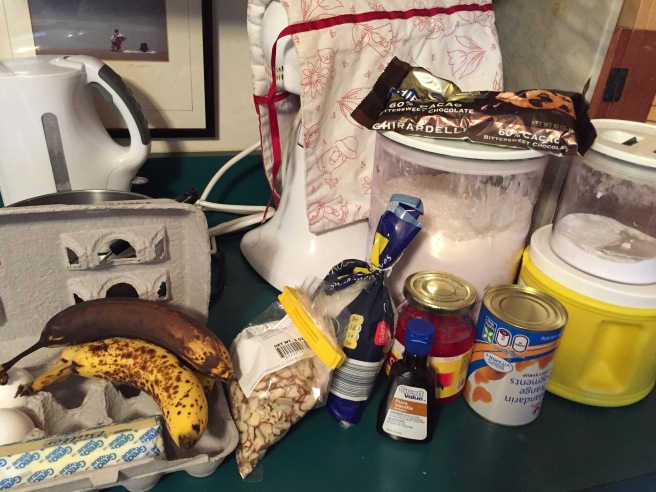
½ cup butter, 1 cup granulated sugar, 2 eggs, 1 teas vanilla, 2 cups all-purpose flour, 1 teaspoon baking soda, pinch salt, 1 cup mashed bananas (3 bananas), 1 can (11 oz.) mandarin orange segments, drained; 1 package (6 oz) chocolate pieces, 1 cup shredded coconut, ½ cup sliced almonds, ½ cup chopped maraschino cherries.

magibreadandorangepeels 003

Drain, dry a bit, and chop the cherries. Drain the mandarin orange segments. Mash the bananas. Sift or whisk the dry ingredients together. Then it goes together pretty much the regular way: cream butter and sugar, add eggs and vanilla, add bananas alternating with the flour mixture. Then stir in the fruit, nuts, chocolate chips and coconut.

Bake in two 8×4 inch loaf pans at 350 F for 1 to 1 ¼ hours.

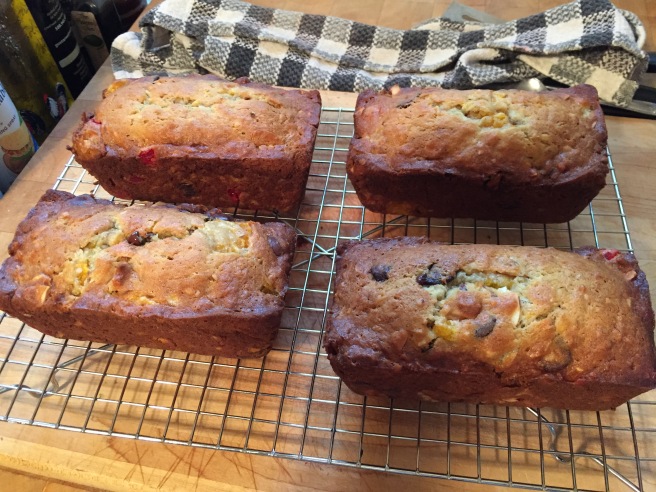
I baked this batch in mini loaf pans and it made 4 nice sized mini loaves. These took 40 minutes to bake. If desired one could drizzle with a glaze or dust with powdered sugar.

magibreadandorangepeels 004

Suffering Succotash!

Lima beans and corn. My Mom was a good baker. She could make candy, cookies, cakes and pies, even biscuits! Dinner food, not so much. She burned canned green beans once. She made regular food in her regular kitchen. I think she enjoyed the advent of convenience foods. She gardened but also bought lots of canned vegetables. She used to can her own vegetables. And she made pickles and jelly. I did not learn how to make pickles and jelly nor to can. Even now the canning process seems overwhelming to me. Then came the chest freezer. This was put in the basement with an adapter for the plug to a non-grounded outlet! This was just the way things were done: (Think about the overplugged electrical outlet featured in the movie A Christmas Story from 1983). With the freezer Mom could now “preserve” fruits and vegetables much more conveniently. She even got recipes for Freezer Jelly. A fond memory I have is that she used to put chocolate chips in a mayonnaise jar in the freezer to keep longer and/or to keep away from us kids. We kids, well me, would sneak handfuls of chocolate. When finally we confessed this Mom confessed that she thought it had something to do with the deep freeze. This new technology of home food storage was new to her!

For dinner she would always serve a vegetable or two. These would either be from the farm stand, her garden, out of the freezer, or from cans in the pantry. For succotash she would open a can of corn and a can of lima beans, pour them in a pot, and heat them.

I have always thought of succotash as a southern dish. I grew up in Missouri and my Dad’s family is from Arkansas/Oklahoma. So when I opened up my  Better Homes and Gardens Heritage of America Cookbook, I was surprised to find it in the New England section, from Maine! Then I looked up succotash on the internet and this makes sense, https://en.wikipedia.org/wiki/Succotash, since the word is Narragansett in origin. The dish apparently became popular during the Great Depression here in the United States and that was the era of my Mom’s growing up years. Some recipes call for creaming the dish with butter and milk. I don’t remember ever having it that way.

A few years ago I decided to resurrect succotash and serve it to my family. My hubby taught me that any frozen vegetable tastes better dry roasted in a skillet with a bit of sautéed onion. I figured this would make succotash taste better too. And it did. I have since begun adding a bit of fried bacon and a few red pepper flakes. And this is what I made for a side dish for dinner after the Christmas holiday.

  • frozen corn
  • frozen lima beans
  • bits of bacon
  • bits of chopped onion
  • a shake of red pepper flakes
  • bit of broth, or water

lateDec2015 030

The amount of corn and lima beans is subjective. Use whatever is on hand or what seems like the amount to feed whomever you are feeding at the meal. I usually use a half bag of corn and 1/4 bag of lima beans. This time I had more beans than corn and it worked out just fine. A few strips of bacon and half an onion, even a quarter onion, should be adequate. I used about 1/4 cup of the bits and ends of the uncured bacon I store in my freezer. (It is almost time to traipse up to Trader Joe’s to get some more.) Oh and then there is the cube of frozen broth. This particular cube is 1/4 cup of chicken broth. You can just add a bit of water if you don’t have broth.

First fry up the bacon until brown and then add the onion for a few minutes. Sprinkle on a few red pepper flakes. Then add the rest of the ingredients.

The water in the frozen vegetables and the broth will steam the beans so they become tender. Mix that around in the pan and then cover with a lid and let steam on low-medium heat for about 8-10 minutes. Stir this occasionally and add a bit more liquid as needed. When done it will be moist but not have much liquid remaining in the pan.

lateDec2015 034

This made a nice side dish for three to four people.

Making Fudge

In planning for all my holiday baking and candy making I went through my Mom’s recipe clipping notebooks over and over again. And I found her fudge recipe.

fudge 002

Before finding this I had gone through my own recipe clipping notebooks and found the Never Fail Fudge Recipe by Eagle Brand Condensed Milk. So which should I make this fine day? I have a meat thermometer but not a candy one. My digital one is not working properly because it needs a new battery and I am very poor at replacing those itty-bitty round batteries.To my recollection Mom did not have a candy thermometer but would test the heat of the candy mixture by putting it in a cup of cold water. She successfully made fudge, divinity, fondant, and other candies with this tried and true method.

fudge 004I choose to go with the Never Fail Fudge adding my own touches:

  • 2 cups semi-sweet chocolate chips and 1 cup espresso flavored chips
  • 1 14-oz can sweetened condensed milk
  • 1 teaspoon espresso powder (I am not sure if this will enhance the chocolate flavor or add to the coffee flavor of the espresso chips)
  • pinch of salt
  • 1/2 cups walnuts
  • 1 1/2 teaspoon vanilla (I always wonder why vanilla extract is added to chocolate recipes.)

Melt chips with milk and salt over low heat. When melted remove from heat and stir in walnuts and vanilla.

Have your pan prepared as this “fudges” up quite quickly. You want to line your pan with foil so you can pull the set fudge out easily to cut.

My daughter has the “fudge pot” that my Mom used. I used that pot making Kraft Macaroni and Cheese (yes, from the box with the powdered cheese!) when bringing up my kids. The best part of my Mom making fudge was that we kids (there were four of us) got to scrape the pan and lick the spoon! Ahh, I did not have any little ones here so I had to refrain from scraping the pan spotless and nibbling too much!

Chill in the fridge for two hours and then there is fudge in the house!

I will leave you with one of the inspirational clippings Mom put in her notebooks. See, she speaks and teaches us even now!

fudge 001

Guest Recipe: Divinity

mom 001

My Mom always made divinity for Christmas time. I stick to fudge but my sister makes divinity. And here is her tale…

We have not had very many ‘fudge’ days (low humidity days) this Christmas season.  So Friday and Saturday were the day to make divinity.

fruitcake and divinity 013

First try, flat and dense, not divine like divinity should be.

I used the recipe from the Kitchen Aid cookbook, not wonderful and reliable.

Saturday morning I try again, a different recipe this time from the old reliable grey book.

divinity 001
All set to go.

Boil the syrup to hard ball.

Beating egg whites after the syrup was drizzled in. Here is where the recipes differ. The first wanted the mixture beaten for up to 20 minutes, and I did that.  This second recipe calls for 5 minutes of beating.

Next into the pan, I then topped it with crushed peppermint candy. (Vanilla flavored the divinity instead of almond) I swiped red food gel through hoping for a lovely effect. Looks very lovely at this point.

fruitcake and divinity 006

The end result is tasty but the texture is odd.  The top half is fluffy like divinity and the bottom half is oozy ( I don’t know how else to describe it).  How did this happen?  Impatience. I took the candy out of the pan to soon. 

fruitcake and divinity 014

The top had already set but the bottom hadn’t. The candy spread, then I cut it into squares.  The spreading continued!

The good news is that it is very tasty divine ooze!

The weather changed; the clouds blow in, no more divinity trials for now.

Candied Orange Peel

magibreadandorangepeels 012

You will never want to make this recipe unless it has some sentimental meaning for you. It is very labor intensive for a small amount of product. I remember my mom making this. I never watched her make it completely. Well, maybe at the very end when they get rolled in sugar, but not the process or the preparation. Well, also the part of removing the pith from our saved orange peels. I do not know which recipe she used. There are two or three possibilities in the notebooks of self-typed recipes and clippings from magazines and newspapers. I made these once before in my adult life but I don’t even remember which recipe I used. For some reason it occurred to make some this year so I set out to save orange peels. I looked up recipes and not many of them scrape the pith from the peel. That is the part I remember the most. I’m confused. But I carry on…

Jaques Pepin! https://www.youtube.com/watch?v=OWr4kDoYNsQ

He knows to only use the orange skin and remove the pith. But he does it with a vegetable peeler. I never thought of that! This is an excellent thing to remember. I may be able to make candied orange peel every Christmas season. Yay!

Shall we proceed?

RR 002Several oranges were consumed over the course of a few weeks. I dutifully scraped the white pith from the peels. I find a spoon is the best tool as a paring knife will cut through the peel instead of just scraping and of course it will also cut the finger tips if not careful.

I admit that I froze the peels after scraping the pith. That way they would not go moldy in the fridge waiting for me to get around to using them! This may be why the final product is not bright orange in color.

I slice these peels up, put them in a pot, and cover them with cold water. Once this comes to a boil, I will drain the pot, put in fresh cold water, bring to boil, and repeat this process so that there are three times the peels are boiled in fresh water. This process is to take the bitterness out of the peel but retain the essential oil.

After the third time drain the peels and put aside. Now we make a simple syrup with sugar and water. Use two parts water to one part sugar. I will use 1 cup sugar and 2 cups water. Bring this to a boil and simmer for 8-9 minutes. It won’t look syrupy but should have a constant boil. Then put in your orange peels. Swirl the pan so that all the peels are covered. Cook these for 45 minutes. I probably did not do this exactly right as mine don’t look syrupy here at the end of 45 minutes .

Drain your candied peels on waxed paper (I use parchment paper). Sprinkle with sugar while still sticky. Let dry.

I am not happy with the result.

magibreadandorangepeels 008
very limp looking

They do not stiffen up like I remember. How to fix? I am thinking of cooking them in a syrup a little longer.


This looks much better.

magibreadandorangepeels 010
syrupy looking after an additional boil

I continue to sprinkle with sugar until they look right. When very wet they absorb the sugar.

This is a sweet-tart confection. You can do a variety of things with it but we just ate it like candy. Just a taste of childhood for the Christmas season.


Pecan Tarts: possibly utter failure!

In the past I have made a Pecan Pie Bar found in a magazine ad recipe. They are very well received when I make them. They have more of a traditional pecan pie topping made with corn syrup. This recipe for Pecan Tarts I have found among my mother’s recipe cards. It appealed to me because it does not use corn syrup in the filling. These are the cute little pecan pie-looking cookies. They are also known as Pecan Tassies and there are all kinds of recipes all over the internet. The newspaper clipping that my mom saved adds a note at the end: “By all means spray the tins with Pam for easy removal.”

A year or so ago I purchased a set of mini muffin tins to replace the ones I had that were beginning to rust. These cost me all of a $1 at a tag sale, (Garage Sale for those of us from the Midwest.) This will be the first time use of these pans.

This is a cream cheese short-crust filled with a pecan butterscotch/caramel filling. A short crust is made without a leavening agent. For the crust:

  • 1 cup soft butter
  • 6 ounces of cream cheese at room temperature
  • 2 cups flour

Blend butter and cream cheese and add in flour. Work with hands to bring together as a dough, then chill. The recipe clipping does not say how long to chill so I will put it in the fridge for 30 minutes.

pecan tarts 016

I think I have come up with a nifty way to shape these into the muffin tins: the small end of my mortar, or is it the pestle. Be right back while I “google” it. ….(a few seconds passing)… It’s the pestle!

I also decide to divide the dough into exactly 36 pieces. The recipe said it made 3-4 dozen.

pecan tarts 017

Now for the filling:

  • 2 eggs
  • 1 1/2 cup packed brown sugar
  • 2 Tablespoons melted butter
  • dash of salt
  • 1/2 teaspoon vanilla
  • 1 cup coarsely chopped pecans

I mix this all together with my KitchenAid. Did I tell you the story of this Mixer? It is one I will always cherish. It was a time when I was going through my divorce, being a single parent with middle school aged children, working per diem, and just trying to adjust. Suddenly there appeared a large box delivered to my door. This was the KitchenAid Mixer. Just there. It wasn’t my birthday or any other special day. It came from my brother-in-law and sister. When I called her she said it was her husband’s idea as he thought I could use something nice. Bless him! So whenever I think of one of the most thoughtful things that someone has done for me, this is the event that comes to mind.

pecan tarts 025

The recipe clipping said to sprinkle the pecans in the tart shells, add some filling, then sprinkle more pecans on top.  I just put all the pecans in the mixture.

Bake this for 15 minutes at 350, reduce heat to 250 and bake another 10 minutes.

Ugly, ugly, ugly!

pecan tarts 028

I clearly filled them too full. I use a soup spoon to lift them out of the tins after running a knife around the edges. They are underbaked. The Great British Baking Show judges would be very disappointed and I would not get to be Star Baker! (Possibly the soggy bottom!)

I continue with the third pan after scrubbing it and spraying the entire top with cooking spray. I try not to fill these as full. Meanwhile I rack my brain to figure out how to save the first two pans. I decide to put them back in the oven to continue baking for 5 minutes. This may be salvation.

pecan tarts 030
the bottoms are now baked

Second batch looks a little prettier, or less ugly, whichever your perspective. I also put them back in the oven for five more minutes on a baking sheet. Here they are, for better or for worse. They taste like pecan pies.

So this was an experience for sure. If using this recipe again I will divide it into 48 pieces, use a teaspoon to fill the tart shells, and leave them in the oven at 350 for the full 25 minutes, if not 30.

I like pecan pie. Maybe my next effort will be a cranberry-pecan pie, or the buttermilk pecan pie. That is a good one as it has the crunch of the pecans with the creaminess of a custard.

Happy Baking to all, and be sure to have fun in the kitchen!


Cookies and more cookies…

chococookies 003

I need to get back to making my Christmas cookies. Why? Because I want lots of cookies. That’s what Christmas is all about. Cookies and fudge. Well there is of course the Christian-ness of Christmas but these essays are about the food part! Thus far I only have a molasses cookie, Rob Roy, and Santa’s Whiskers. I have not been making a cookie batch each weekend. But now that I am homebound with my broken ankle, I can wheel around my kitchen and put some batches together.

I want a chocolate cookie. I looked at several of you bloggers’ cookie postings as well as my Mom’s notebooks. I had a list from her recipe file but have not chosen to make all of those anymore. There were a lot of good looking cookies to choose from. I settled on a Chocolate cookie that Mom notes are a good drop cookie. Although the title is Chocolate Coconut the coconut is only used as a garnish. I think I will use my homemade mint extract in the frosting and roll is sprinkles. I have a lot of sprinkles and red and green sugars from Christmases past.

chococookies 004

While perusing Mom’s recipes I find another Betty Crocker “How to” booklet. “How to make the perfect cooky”. This one is from 1966. And there is another quiz on the back to rate your bake.


chococookies 006


The chocolate cookie recipe that I chose is for sandwiching. It bakes up cake-like similar to the molasses cookie.

  • ½ cup soft shortening: I use butter;
  • 1 cup sugar; 2 eggs;
  • 1 teaspoon vanilla;
  • 2 cups sifted flour: I don’t bother with sifting;
  • 2 teaspoons baking powder;
  • ½ teaspoon salt; ½ teaspoon soda;
  • ½ cup cocoa;
  • 1 cup buttermilk: I make sour milk by putting 1 Tablespoon of white vinegar in the measuring cup and adding milk to the one cup mark.

This mixes up the ordinary way: cream butter and sugar, add eggs, one at a time, add vanilla and dry ingredients alternately with the buttermilk. Of course one has whisked the dry ingredients thoroughly in a separate bowl prior to this step. The batter is very cake-like as it comes together. Bake 12-15 minutes at 350 degrees F.

They are mostly uniform in size. I now need a frosting. I will just make a vanilla buttercream. I had a lengthy and interesting conversation with my sister, a fellow avid cookie baker, about buttercream and how sweet it is, too sweet for some. She tells me about her internet research into buttercreams and directs me to this blog: http://thetoughcookie.com/2015/06/07/how-to-make-flour-buttercream-or-ermine-buttercream-the-battle-of-the-buttercreams-2-0/

  • 4 1/2 Tab flour
  • 1 cup sugar
  • pinch of salt
  • 1 cup milk
  • 1 cup unsalted butter
  • 1/2 teas vanilla

I read the blogger’s series all about this testing and improving Butter-creams. I am just going to use the Vanilla Flour Buttercream recipe to fill cookies and not go through the more work of making the German Buttercream.

I was looking at this Buttercream and comparing it to the Chocolate Velvet Frosting I made for the Birthday Cake. It is the same pudding principle. One cooks the sugar, flour, and milk into a pudding, let cool, and proceed with the butter and flavorings.

afterThanksgivingCakeHumility 008The improvement that the blogger made in adding the “pudding” to the beaten butter could be done to the Chocolate Velvet and would have made it less pudding like and creamier. So it should be possible to make this buttercream with water and cornstarch if need be. The frosting I made today is with soy milk for the lactose intolerant of my family members.

I have been baking all my life and still have lots to learn.

notebook 001


What I do need to do is get these notebook pages in acid-free sheet protectors sooner rather than later, particularly now that I have started using them again.

Birthday Cake

I have the privilege of making the birthday cake for my granddaughter’s second birthday party. What to make? I had recently organized some photos and found some of my daughter and there was one of her third birthday and the cake I made then. And it is in the shape of my granddaughter’s favorite word: cat!

afterThanksgivingCakeHumility 014
1986

This is right out of Betty Crocker. I don’t remember making neither the cake from scratch, nor the frosting but this time it will be. But it is not easy to decide on which cake recipe to make. I am thinking that the cake made for son-in-law’s birthday was a bit denser than I would like for this cake. Perhaps I should just use a Betty Crocker recipe for a white or yellow cake. Food for thought!

So I decide to peruse my Mom’s recipe notebook, the one with her typed recipes and clippings. I have only used two of the recipes in the cake section, Best Ever Chocolate and Mayonnaise. What else is there? There is a booklet published in 1967 by the Betty Crocker company, whoever they may be, all about the perfect cake from scratch and mix.

There is even a quiz on the back to rate your cake. How cool is that! I also found a description of the “regular way” for mixing a cake. This is your standard cream butter and sugar, add eggs one at a time, sift dry ingredients together and add alternating with the milk. Now I just need to find a description of the “mix easy” method.

afterThanksgivingCakeHumility 015In preparation to make the “old fashioned” cake from the Betty Crocker booklet, I need to make my own cake flour. Every once and a while I will buy this stuff, but rarely, and I do not have any on hand at the moment. This is easy to do. Replace two tablespoons of each cup of flour with cornstarch. Sift thoroughly. This particular cake recipe makes it easy. Just replace the ¼ cup with cornstarch and use two cups of regular all-purpose flour. Pretty handy dandy, I’d say.

Making the cake: ah hah! This is the “modern method”, one bowl, super quick! Mix together all the dry ingredients. Add exactly 2/3 of the milk, the shortening/butter and flavorings and beat for 2 minutes, or 300 strokes. Add the two unbeaten eggs and the rest of the liquid and beat for another 2 minutes. Pour batter into pans and bake 30 minutes at 350 F. There is a footnote in the booklet that says to add cocoa and baking soda, if the recipe calls for it, with the dry ingredients.

Looks nice in and out of the pans. I used baking spray with flour added so the one cake did not turn out of the pan perfectly. Luckily I will frost these and that should take care of that.

Decorating the cake is a challenge. I could not find licorice whips just twizzlers. I could pull those apart…or buy thin pretzel sticks for the whiskers. I am using vanilla wafers for the eyes and paws as that is what I did 30 years ago. Perhaps using frosting pens to draw the nose, mouth, and outline the ears and paws. I finally chose to use red pull apart Twizzlers. I make a chocolate pudding type frosting and then decorate.

Voila!skylarbirthday 001

Like mother, like daughter!

Making Do! A lesson in humility

I interrupt my next planned blog on birthday cake to write about unplanned, unwanted events. First of all “It could be worse.” I am on the first full day of hobbling around on crutches with an air-boot on my right foot. afterThanksgivingCakeHumility 020This is my driving foot so I am housebound and dependent on others to get out of the house. I am very blessed to have the world’s best hubby to watch over and take care of me. However I am not used to relying on others and this is an ongoing life lesson for me.

I am not feeling sorry for myself. People have much worse events and conditions to live with, some for all their lives. So, I have to harness my Mom’s “make do” spirit and make do!

To explain, I fell. I busted (is that the proper word?) my upper lip and chin and broke my ankle. It happened very quickly and I was not able to catch myself before hitting my face.

So now I have learned what a fat lip looks and feels like. When my coworkers looked at my face they saw what I only saw looking in the mirror, which I don’t do often. Went and got the medical care needed and here I sit. When the pain lessens I hobble around the house on crutches; I go up and down the stairs on my butt like a two year old, and I wheel myself around the house on my sewing machine chair which has wheels. I am grateful that I have hardwood floors as maneuvering in the chair would be much harder on carpet.

I am supposed to be making a birthday cake for granddaughter’s birthday party this weekend. My kitchen is not scaled to chair level but I can stand with the crutches. Maybe I’ll tackle that tomorrow.

Hubby set out chicken thighs to thaw for dinner tonight. I saw a chicken recipe on the Food Network site, http://www.foodnetwork.com/recipes/melissa-darabian/roasted-garlic-clove-chicken-recipe.html ,that looked tasty as well as on another blogger’s site. https://cookingforthetimechallenged.wordpress.com/2015/12/03/grilled-chicken-cutlets/

This is my adaptation/combination/inspiration from these two recipes.

I’ve got 6 chicken thighs, mostly without skin. I juice and zest ½ lemon. This is my favorite old time citrus juicer. It is from my Mom. It is a WearEver Aluminum, made in the U.S.A.

I use ¼ cup canola oil, and about a teaspoon of Herbs de Provence. Oh, and a clove of garlic. Swirl that all together with ¼ chopped onion and pour in the Ziploc bag with the chicken. Fiddle around with it to get the marinade all around the chicken.afterThanksgivingCakeHumility 026 Place back in fridge and wait for dinner time. I will cook these in my 10 inch cast iron skillet. The rest of dinner will be baked sweet potatoes, and green beans.

humility 004
And dinner is served.


I can do all of this from my “wheeled” chair and crutches! That’s called Making Do!