My thoughts from my kitchen this week are about vegetables. I have been dreaming about fresh vegetables. Given that I have been putting off going to the grocery store we have been eating frozen vegetables and canned fruit. We, Hubby and I, tend to over-buy groceries wherever we go. We spend too much on groceries and then find ourselves wanting to go out to eat but cannot justify it. If we spend less on groceries we should be able to go out when we have an urge to do so. We have also been doing this to avoid the contaminated produce amid the Cyclospora outbreak.
We have been housebound by the hazardous air quality in our region. We are “older” so we figure we are in the category of “sensitive individuals” even though we do not (knock on wood) have lung/breathing issues. So one afternoon I feel restless and decide to do the grocery shopping. We diligently make a list and head off to the Walmart. I do not particularly like shopping at the Walmart but the prices are more compelling than shopping at the mainline grocers. Plus we can buy 5 dozen eggs for about $10. It is a weekend afternoon and everyone and their dog is here. The parking lot is filled. We take our list and start walking to the entrance. A woman and her child are heading back to her car. Hubby comments that it looks jamming inside. She reports that the checkout lines are backed up into the aisles. She is glad to be out of there.
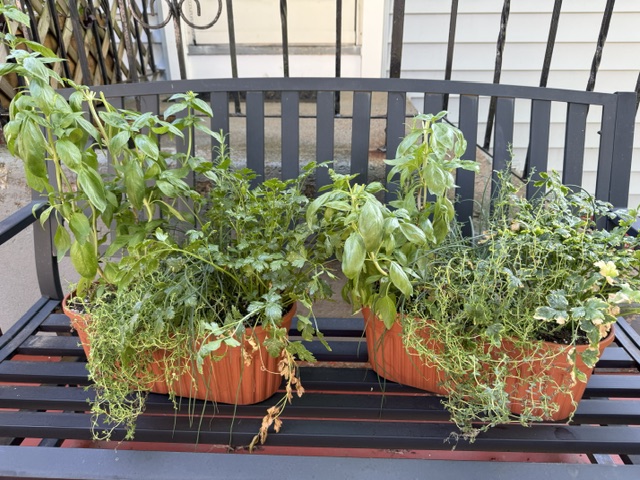
Hubby and I think about this. Being retired we have the luxury of not having to run our errands on weekends. He suggests we go get ice cream instead. Good idea. We head back to our car. On the way to the ice cream place I head up the road past a farm market that I know about and have shopped at before. It was on the highway exit on my way home from work so it has been a few years. But it is open. Yay! Local produce is higher priced than at the grocery stores. It’s sort of “boutique-y” around here. But it is most likely not contaminated. The greenhouse that abuts the store entrance is full of planters which have just been watered and we dodge the water dripping from the ceiling. There are herb planters here. Inside we find produce.
Two for one! Basil, chives, parsley, and thyme.
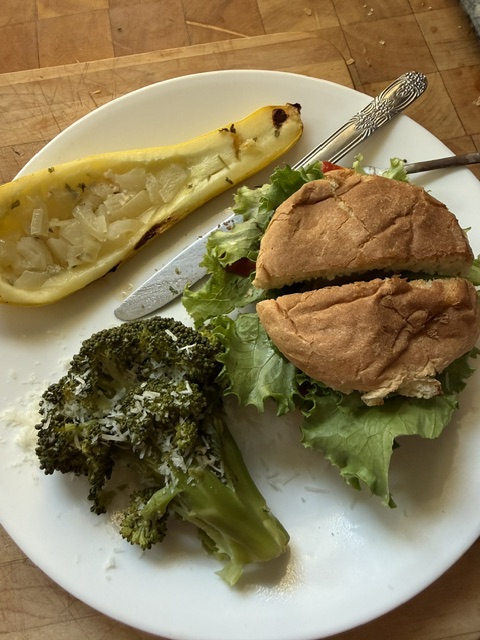
And now the recipe: Summer Squash
Cut squash in half lengthwise. Scrape out seeds. Fill cavity with bits of butter, garlic, onion, and a little parsley. Wrap in foil. Cook on the grill for about 10-15 minutes. Unwrap and enjoy!
Look at all the lovely produce, summer squash, broccoli, and lettuce!
Here’s the setting: Thanksgiving Eve afternoon Granddaughter and I are making bread rolls. I had found a recipe that makes three dozen which is the amount needed, a dozen for our annual Thanksgiving Eve Birthday Feast (for Granddaughter and Son-in-Law) and two dozen to take with us to Step-daughter’s house on Thanksgiving Day. Granddaughter and I were enjoying watching the dough being kneaded in the KitchenAid mixer and admiring how it pulled away from the sides. We enjoyed poking at the dough and were pleased with its elasticity. We divided the dough after the first rise into three sections. I showed her how to divide her section up into twelve “equal” pieces and she set about making cloverleaf rolls in the muffin tin. I arranged two dozen rolls in the 9 x 13-inch pan for overnight rise and baking in the morning. All was good.
Except…for some reason I decided to actually paint the rolls with egg wash. Granddaughter painted her rolls with the brush and then I had her paint mine. We let her rolls rise and then baked them for our dinner feast and they were delicious. No leftovers. The larger pan was covered loosely with plastic wrap and put in the fridge for overnight.
Thanksgiving morning arrives. We have our breakfast of eggs, bacon, juice and of course coffee. I have let the overnight rolls sit on the counter for at least an hour to take the chill off. They look okay. I figure they will have an oven rise and puff up nicely. They bake and when I pull them out of the oven they look sad. They are done but they look very sad.
What to do? We are trying to leave the house by 10:00 AM to drive 3 1/2 hours to New Jersey for dinner today.
I have a reputation as a baker to maintain in this family. I don’t think I can take these and present them in good conscience. It’s 9:10 AM at this point. This is where 60-minute rolls come in. I have them in the Fleischmann’s Bake-it-easy Yeast Book, which is more of a booklet. The one I have was published and printed in 1971. This has been a standard roll recipe through the years and I am relieved to have thought of this. I’m making the bread dough and am at the second rising when Hubby starts shooing folks on their way saying we are wanting to leave at 10:00 and it was now 9:50 AM. I have to tell him we are slightly delayed because the rolls are not baked yet. Daughter reports she remembers using this recipe for our Christmas Eve dinner and half for Cinnamon Rolls for Christmas morning when it was just her, Son, and me. We say our goodbyes to the visiting family all who have other destinations for the day and start packing the car for our journey. We are on the road by 10:45 AM. All told the Sixty Minute Rolls took 1 hour and 10 minutes.
3 1/2 to 4 1/2 cups all-purpose flour
3 Tablespoons sugar
1 teaspoon salt
2 packages active dry yeast
1 cup milk
1/2 cup water
1/4 cup butter
In the large bowl of the stand mixer thoroughly mix 1 1/2 cups flour, sugar, salt, and undissolved yeast.
Combine milk and water and butter in a Pyrex measuring cup and microwave for about 1 1/2 minutes until the temperature is between 120 and 130 degrees F. Butter does not have to melt. Gradually add this to the dry ingredients and beat 2 minutes at medium speed, scraping bowl occasionally. Add 1/2 cup more flour and beat at high speed for 2 minutes. Add additional flour to make a soft dough. Knead until smooth and elastic, about 5 minutes. I use the bread hook of the mixer. Put in greased bowl, turing to grease the top. Cover and let rise in warm place for about 15 minutes.
Turn onto lightly floured board and shape into 24 rolls. Place in greased pan and let rise, free from draft, for 15 minutes. Bake at 425 degrees F for about 12 minutes until done.
Notes:
In my haste I believe I used only one packet of yeast. Actually, I used 2 1/2 teaspoons of Fleischmann’s Bread Machine Instant Yeast. I have since made the recipe again and used the proper amount of yeast and they do rise a bit more.
Also, the instructions for the first rising say to put the bowl in a pan of warm water. I have never done this, ever.
I use the microwave for heating the liquids, one can use the stovetop. I always use a thermometer to test the temperature.
I use the same mixer bowl as the greased bowl by moving the dough to one side, brushing the pan with oil (or cooking spray), rotating the bread back to the other side and adding more oil. Holding on the ball of bread dough and swirling in the bowl makes sure it is oiled all over. Granddaughter enjoyed doing that bit.
I don’t remember why I had brushed the rolls with egg wash before the second rise after shaping. That does not make sense. I wonder if I let both pans have their second rise and then brushed with egg wash right before the first pan went into the oven and the larger pan go into the fridge? I generally don’t use egg wash anyway. Odd!
We arrived on-time to family in New Jersey with our rolls, Hubby’s stuffing, and “the best ever chocolate cake you have ever eaten in your life”! Step-daughter renamed the Best-Ever Chocolate Cake that I have been making since my childhood.
Happy belated Thanksgiving to all, and Happy Holidays and Merry Christmas!
This is another food item that does not require a recipe, in my opinion. You may have a family recipe tradition with particular herbs and spices or quantities but I do not. I did not grow up eating this dish although Mom served us a lot of casseroles. I have seen a variety of recipes for this and I know that I have Americanized this dish as I do not use lamb. I have made this vegetarian using lentils but Hubby does not like that much. At a restaurant in Boston recently the chef made this with a tomato based meat mixture. My step-daughter and I thought that was odd, or at least, rather unique. That chef also put a piece of puff pastry atop the mashed potatoes for an interesting presentation.
The church I attend has a rotation of serving a weekend meal at our local soup kitchen. For simplicity they serve Shepherd’s Pie as the main dish and not have a potluck by the parishioners. The recipe suggested is as follows:
2 pounds ground beef, browned
1 large onion, chopped and sautéed with the meat
2 cans creamed corn
2 cans green beans, drained
Mashed potatoes to cover, instant or real (about a 2 /1/2 pound bag)
Salt and pepper to taste
The meat and onion is put in a 9 x 13-inch pan. Spread vegetables over meat and mashed potatoes on top. Bake at 375 degrees F for 25-30 minutes.
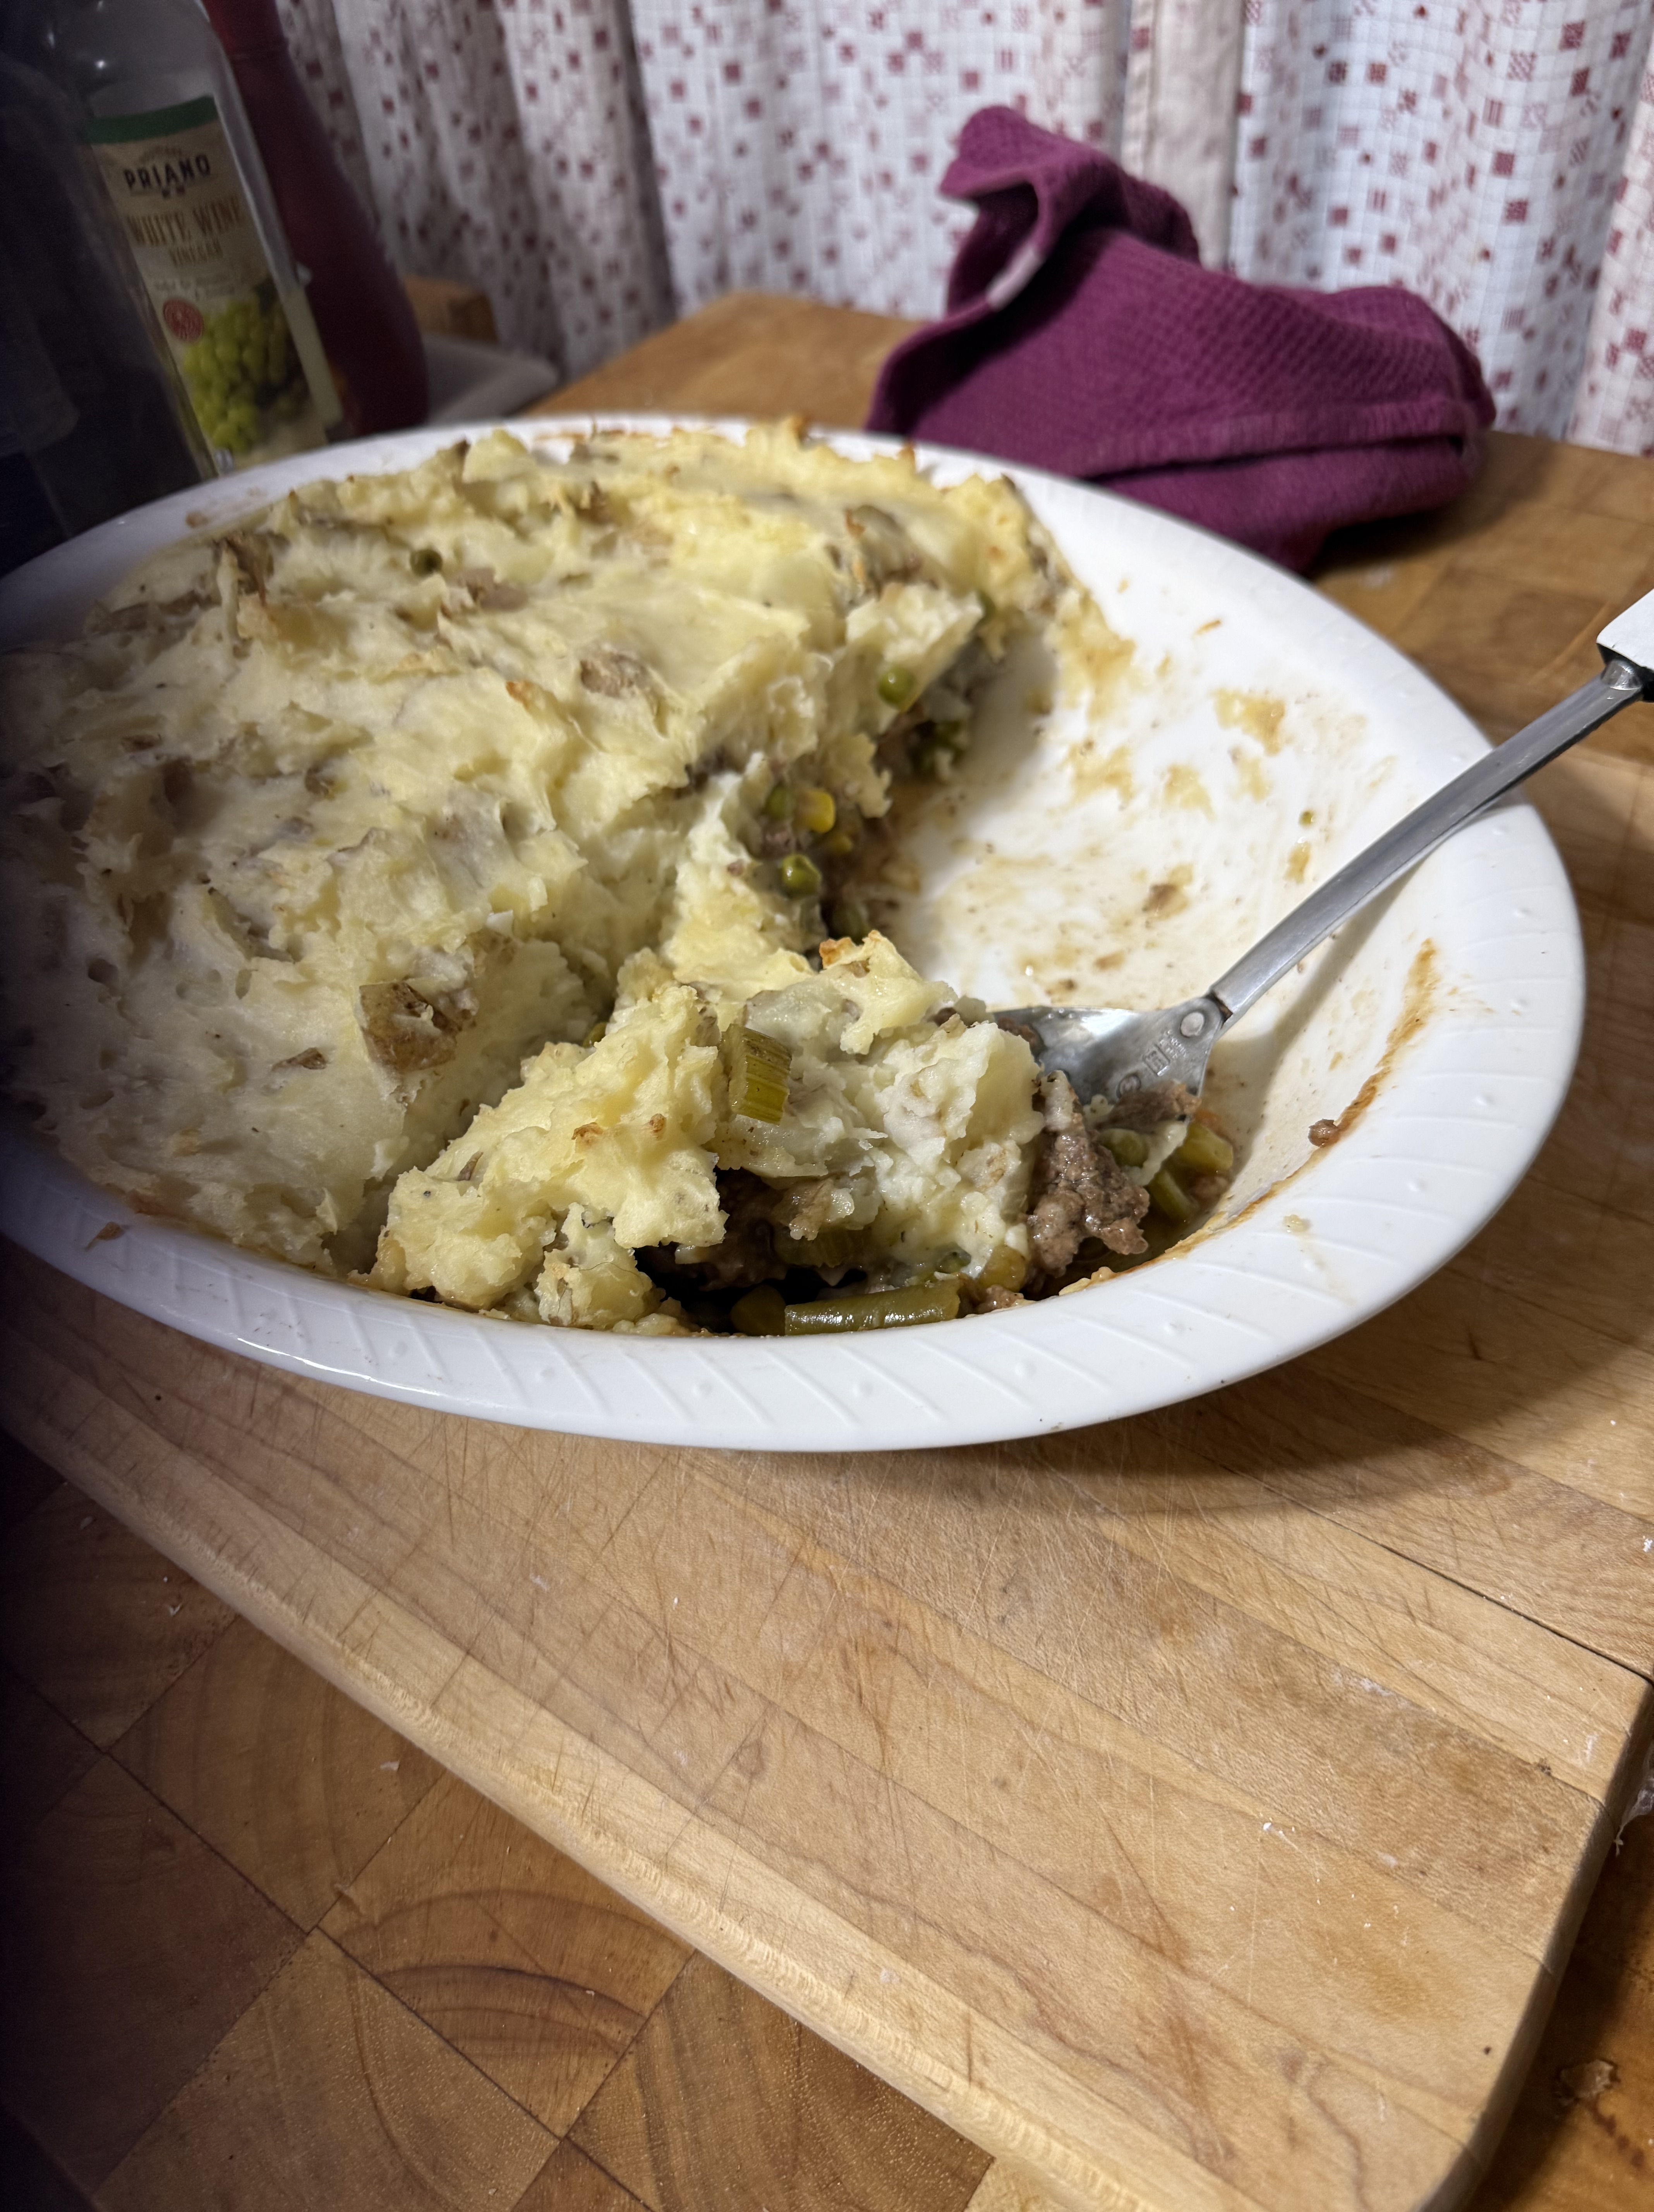
I indulge in a delivery service of locally sourced meat and I receive a pound of ground beef each month. This month I made a Shepherd’s pie, pictured below. I do not use the above recipe although it does make a tasty dish. Mine is a mixture of ground beef with sautéed vegetables in gravy. This is topped with mashed potatoes and baked until the top is crusty but not brown. The insides will be bubbling. Cool for a short while, serve, and eat.
The type of vegetables can vary. For me it depends on what I have around but mostly consists of a bag of frozen mixed vegetables added to sautéed chopped onion. This is cooked with the browning of the meat. I then add a half cup of broth and then another half cup mixed with a tablespoon of cornstarch. This makes a moist but not loose meat mixture under the mashed potatoes. Cheese and sour cream can be added to the mashed potatoes as desired. Although it is a hardy meal Hubby and I usual have two serving each! We won’t be losing weight this way!
Well I seemed to have lost momentum for writing. So I’ll try again. It’s not like I don’t have time. My time is my own as I am retired. There are some demands on my time such as Stepdaughter’s wedding, Easter celebrations with grandkids complete with burnt cinnamon rolls, attempts to keep an exercise routine going, various healthcare appointments, etc.
And I am cooking and baking just not writing about it partly because I don’t always make something new and I try other bloggers’ recipes. And some of those are very worthwhile to make over and over again!
I was gifted by a friend several (actually a lot) packages of frozen meats. I have ground pork from which I will be trying to make younger Stepdaughter’s pork pie. But what to do with ground beef? There is just so much chili my aging stomach can tolerate. Hubby will be making his fancy meatloaf at some point, and we have preformed burger patties ready and waiting already. So I perused a few of my many cookbooks, looked at the NYTimes Cooking app, and decided to make Stir-Fried Beef with Onions and Ginger from Mark Bittman’s How to Cook Everything but with ground sirloin instead of flank steak. My ingredients are as follows:
1 medium onion, chopped
1 garlic clove, minced
Olive oil for sauteing the onion, and then some more for the pan to brown the meat
1 inch ginger root, minced
1 pound ground sirloin beef
1/2 cup vegetable broth, homemade
1 Tablespoon soy sauce
First, brown the onion on high heat until beginning to char, then I added the garlic just at the end. Sprinkle with salt and pepper and remove from pan. Add more oil, most of the ginger and the beef. Stir cooking this until the beef is no longer pink. Add the rest of the ginger, the broth, and the soy sauce. Cook and stir until most of the liquid is gone, but leave some. This process took less than 20 minutes with the ingredients prepped already.
I served this with rice and a cucumber/carrot salad with sesame dressing.
Thoughts: the fat in the ground sirloin (90/10) and the onion overpowered the ginger. The sesame dressing on the salad had more flavor. It also needed a sauce. Very thinly sliced flank steak would be the choice of meat as in the original recipe. For the leftovers I will douse this with teriyaki sauce. It could then be served over more rice or in a wrap.