Simple Custard with a little Extra

Way back when I had children in my house I made the Baked Custard recipe from my 1978 Betty Crocker’s Cookbook. This became the go to custard to make, although years have gone by without me making it. I was wanting to make a light dessert because we had been overeating and feeling too full and lethargic. I also had many, many eggs in the house and had been asked by my son to have the ingredients necessary for Creme Brulee for when he visits soon. He’s bringing a friend along!

This recipe for custard is nice because it can be cut by 1/3 super simply. Why, might you ask? The recipe makes six custard cups. For some reason I only wanted to make four, most likely because I only had 4 Pyrex custard cups!

Here are the ingredients for 4 custards:

  • 2 eggs, slightly beaten
  • 1/4 cup sugar
  • dash of salt
  • 3/4 teaspoon vanilla
  • 1 2/3 cups milk, scalded

Don’t be scared away by scalded milk. I put the milk (you can use half-and half also) in a glass measuring cup/bowl and nuked it in the microwave for one minute. That’s scalded enough for me.

In medium bowl whisk together the first four ingredients. Stir or whisk in the milk gradually. Pour into the custard cups. Being in the autumn mood, I put a tablespoon of pumpkin flavored chips in the bottom of each cup before pouring. I am not sure what outcome I was expecting but I was pleasantly surprised. I forgot to sprinkle nutmeg on the tops but this worked out well too.

The custard is baked in a bain marie. I find that my four larger custard cups fit nicely in a 9 x  13 inch baking pan. Pour boiling water into the pan to within an inch of the top of the custard cups. Bake for 45 minutes until a knife inserted in the center comes out clean.

(Silly me, I had the weirdest notion that I could bake the dessert while supper was cooking, entirely forgetting that pizza was to be baked for supper! Supper was a little later than planned that evening.)

20160927_230716974_ios

The pumpkin-flavored chips floated to the top and made a nice little crust. They also made a bit of goo on the bottom. Very tasty and pleasing textures in every bite.
Birthday pie: lemon meringue

My stepdaughter is having a birthday and then she’s going off to join the Air Force. Wow! It is tradition to have the birthday child to select the type of dinner and cake she/he would like for their celebration. This one likes pie. Apple pie, lemon meringue pie, pie! This year she has selected barbecue ribs (Hubby’s job to grill) and lemon meringue pie which is mine to make.

I have a French cookbook of the coffee table variety which has a wonderful recipe for lemon meringue pie with a lemon curd. That uses butter. I also looked at one of my British baking books which has both a lemon curd tart and a lemon meringue pie. Which to make?

I decide to go with the lemon meringue pie from Home Baking: Cakes, cookies, pies, pastries, bread (Paragon Publishing 2005). I am not following this exactly because…well, just because! Almost, but adding one more egg and one more lemon. Here are my ingredients:

  • single pie crust; I recently made a batch of the apple cider vinegar pie crust and have one disc in the freezer. I thaw this out.
  • 3 tablespoons cornstarch
  • 1 1/4 cups cold water
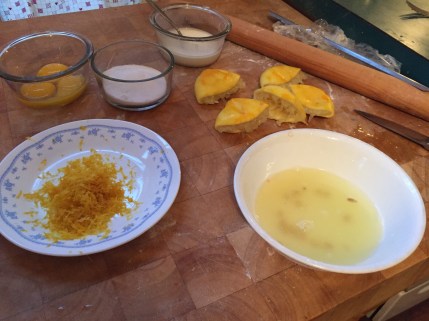
  • juice and grated zest of 3 lemons
  • 1 cup of sugar, divided
  • 3 eggs, separated

The pie crust needs to be pre-baked. i do not do this well. I want to buy some of those pie beans or some such to learn to do this better. But I have to make do with what is available. I do not have dried beans in the pantry. What to do? Last time I tried to pre-bake a crust I put a pot lid on it and this was not successful. It puffed up underneath the lid and the edges shrunk. This time I fit a disposable foil pie tin inside the pie pan and then put the lid on it. The recipe says to prick the crust all over and bake at 350 F for 15 minutes. I did this and then uncovered the crust and let it bake for another 10 minutes raising the temperature to 375 F. This worked nicely, light brown, no shrinkage.

20161020_214726222_iosNow for the filling. I do a nice mise en place. I have misplaced/lost the insert to my old-time juicer so juicing the lemons is not as fun or simple as it was before.

Mi the cornstarch with 1/4 cup of the cold water. Put the remaining water in a medium sized pot along with the lemon juice, zest and cornstarch paste. Bring to a boil, stirring, and cook for 2 minutes. Let cool slightly. Stir in 5 tablespoons of sugar and the egg yolks. I temper the egg yolks by stirring in a little of the lemon mixture first so as not to have scrambled eggs in the lemon pudding. Pour all of that into the pie shell.

Whip the egg whites until stiff and then whisk in the remaining sugar. I read up on meringues and later figured there should have been more sugar and I should have waited to put the sugar in and should not have whipped them so stiff. Anyway I then had to spread this carefully over the top of the pie. And since it was so stiff it did not spread easily.

Very lemony taste! I am not sure why the meringue cracked unless it was because i whipped the egg whites too stiff.  It was enjoyed by all!

First Bread

Fall is here and the cooler weather begs for bread baking. A few years ago my son told me about the book Artisan Bread in Five Minutes a Day by Zoë François and Jeff Hertzberg. Now this recipe is all over everywhere, even on King Arthur Flour, recipe. I use the recipe for The Master Recipe: Boule (Artisan Free-Form Loaf) from the book.

  • 3 cups lukewarm water
  • 1 1/2 tablespoons granulated yeast
  • 1 1/2 tablespoons kosher salt
  • 6 1/2 cups unsifted, unbleached, all-purpose white flour, measured with the scoop-and-sweep method
  • cornmeal or pizza peel (or baking sheet)

I use an empty 5 quart ice cream tub. And I don’t care if it forms a seal when covered in the refrigerator. This is a super simple bread recipe. It does make an artisan bread so is not the same texture as sandwich bread or the standard bread kneaded with two risings. But it is good. If you are a novice bread baker this is a good bread to begin your bread baking.

Put your water in the tub. Sprinkle on the yeast and the salt. It may not dissolve completely. No worries. Add the flour all at once and mix with a long wooden spoon until no dry spots; all the flour is incorporated. Cover loosely and let sit at room temperature for at least two hours. I forgot about mine and it sat for 4 hours. (Binge watching television shows occupied my time!) And then put in refrigerator. The original recipe says it should be refrigerated at least 3 hours.

I baked the first loaf the next day. Sprinkle the top of the dough with flour. Reach into the tub and pull our about 1/4 of the dough. Oh, flour your hands first and sprinkle cornmeal on your pizza peel if you have a baking stone or on your baking pan. I used a baking pan because last spring my baking stone broke in two and I have not yet replaced it.

Add a little more flour to the dough in your hand and stretch the top onto the bottom shaping into a ball, smooth on top and bunched on the bottom. Put this on your cornmeal sprinkled pan. Let rise and rest about 40 minutes. Depending on how fast your oven preheats you want it to be 450 F when you are ready to bake your bread.

To be authentic there are instructions to heat a pan of hot water at the bottom of the stove but I did not do that for this loaf, nor for the second loaf!

Just before putting it in the oven, sprinkle the top with flour and slash the top with a serrated knife. This allows for an oven rise through the surface. Bake in the 450 F oven for 30 minutes. The loaf should be firm and nicely browned.

20160928_213937423_ios

Truth be told this does take more than five minutes per loaf. The actual time you spend with the dough is about that though. With a batch of this dough in my fridge I can come home from work and have bread on the table in just over one hour: 5 minutes shaping, 40 minutes rising, 30 minutes baking.


Maple Pound Cake

I have been baking, and cooking, just not writing! We got a late start on camping this summer so are trying to make up with the weekends that are remaining through October. There’s something about camping that makes sitting around doing nothing very productive. This is compared to sitting around at home doing nothing which is just plain laziness.

I am back to using King Arthur Flour recipes. I have not yet taken up their current bake-along challenge but may do so in the future.The catalog flyer they send each month has a few recipes in it along with the promotions of their products for sale. This latest had a Maple Pound Cake with Maple-Rum Glaze recipe which looked and sounded tasty and seasonal. It is definitely fall in New England and the Sugar houses will be full of maple syrup soon. Here is the link to the recipe on their website. http://www.kingarthurflour.com/recipes/maple-pound-cake-with-maple-rum-glaze-recipe

I followed the recipe almost exactly because that is just the kind of baker I am! Mise en place is essential for baking and I failed to pay attention to the recipe and what ingredients I had in the house. What type of baker runs out of butter! I had only some butter so I substituted coconut oil. This was solidified being less than 70 degrees F in my pantry. I also made my own cake flour using the directions from Mark Bittman’s book How To Cook Everything.

  • 1 3/4 cups all-purpose flour whisked with 1/4 cup cornstarch (OR 2 cups cake flour)
  • 1 teaspoon baking powder
  • 1/4 teaspoon baking soda
  • 1 teaspoon salt
  • 10 tablespoons coconut oil and 2 tablespoons butter (OR 3/4 cup butter, softened)
  • 2/3 cup dark brown sugar, packed
  • 2 large eggs
  • 1/2 cup dark maple syrup
  • 1 cup sour cream
  • 1 teaspoon vanilla extract (the recipe also calls for 1/4 teaspoon maple flavor but this I do not have)

Sift the first four dry ingredients in a bowl. Cream the coconut oil/butter with the brown sugar in separate bowl. To this add and beat eggs one at a time and then add the maple syrup. Now add half the flour mixture followed by the sour cream and vanilla. Then add the remaining flour. Mix just until combined.

You will have preheated the oven to 350 degrees F and lightly greased a 9-10 cup bundt pan. Pour batter into the pan and bake for 45-50 minutes until cake test done. Let cool in pan for 10 minutes and then turn out on a cake plate. My cake did not come out cleanly. I had to patch some of the pieces of the top (or bottom, depending on your perspective) of the cake back to the cake like a puzzle. Luckily this does not affect the taste. No Star Baker for me though!

While the cake is baking, or actually when you pull it out of the oven, make the glaze by combining 2 tablespoons butter (I found a partial stick of butter in the camping butter container), 1/4 cup maple syrup, and 1/4 cup rum (or water) in a saucepan. Bring this to a rolling boil, lower the heat, and simmer for 5-8 minutes until thickens to a syrupy consistency. I forgot to check the consistency and just simmered it for 8-10 minutes. Remove from heat and pour over the warm cake.

The directions say to let the cake cool completely before serving. What? Why?

I let it cool just a bit while finishing an episode of the current Binge Watch on Amazon!

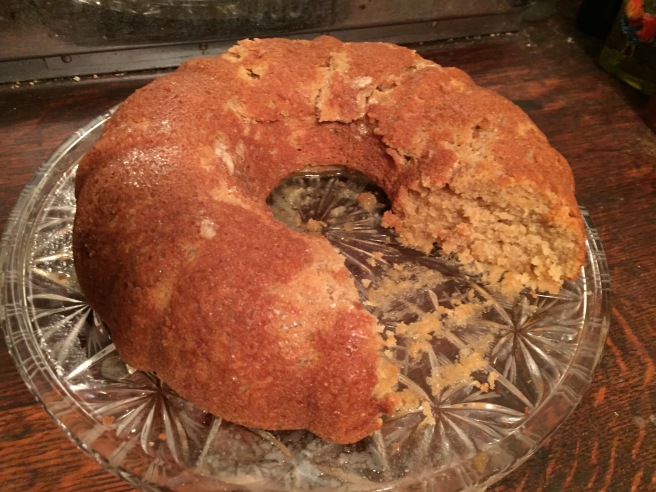
20160925_231212604_ios

This is a flavorful and moist cake. Hubby asked for a piece to put in his lunch the next day. This recipe is a definite keeper. Ice cream or real whipped cream could be added but is not necessary.


Cherry Custard Tart!

I confess this is an experiment. I long to make cherry cafloutis and have not been successful. I think it is the texture that is foreign to this mid-American palate of mine! And ever since I watched all of the BBC series As Time Goes By I have urges to make Custard Tarts which were Lionel’s favorite teatime treat.

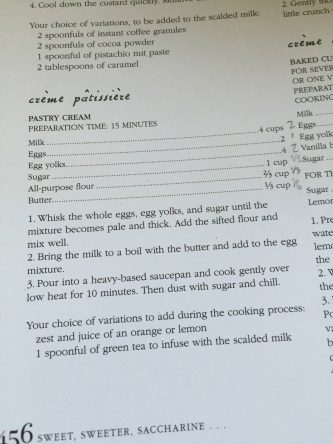
The weather cooled off sufficiently for me to want to turn on the oven. What to bake? I dream of biscuits, cakes, pies…and custard tarts! I have a pie dough circle in the freezer and get that out to thaw. I go through my French Feasts cookbook looking for custard. There are lots to choose from. Questions flood my brain: do I pre-bake the crust? which custard cream can be baked? do I bake the cream in the crust? Should I make the whole recipe or half. I see that I and the son have marked the recipes on Page 456 with the amounts for half recipes.

I chose the creme patissiere (pastry cream). I chose to prebake the crust and possibly bake it again with the cream filling. I do not spend any time researching what to do through cookbooks or the internet. I roll out the crust and try to fit it to an 8 inch spring form pan. This was my first mistake: I should have used a regular 9 inch pyrex pie pan. Who knew?

I also decide to make a topping using canned tart cherries. I “melt” 1/2 cup apricot jam in a small sauce pan and add 1/2 can of cherries. Bring to boil and stir.

20160911_215721278_iosFor the “creme pat”:

  • 4 cups milk; I make this with 2 cups half-and-half and 2 cups water. The only milk I have in the house is almond milk and that has very little fat in it.
  • 2 eggs
  • 4 egg yolks
  • 1 cup sugar
  • 2/3 cup flour
  • 1/3 cup butter

Whisk the eggs, yolks, and sugar until pale. I don’t think mine got to pale. I used a hand whisk and not the mixer. I add about 1/2 teaspoon vanilla to add some flavor. Meanwhile put the milk in a heavy bottomed saucepan with the butter. And scald. To this I added the zest of one lemon to augment the custard for the cherries. Add a little of the scalded milk to the egg mixture and then return to the saucepan whisking constantly while adding. I then remembered to add 2/3 cup sifted flour to the egg mixture before I had added it all to the milk. I got that sorted out and this mixture gets cooked gently for 10 minutes. I whisked it a lot of that time to be sure it would be smooth. It came out nicely. I have too much pastry  cream for the little crust I had formed.

I baked the crust for 10 minutes with lid used for the baking blind. I have to get me some of those “baking stones” soon! Ugly, ugly, ugly! And not so crisp. The sides shrunk down as well. I have very little success pre-baking pie crusts. I put it back in the oven for 5 minutes without the lid in it. Now it looks a bit browner. Maybe it is okay. I decide at this time to just add the pastry cream and chill.

20160911_224653447_ios

The mistakes I made:

  1. not properly shaping and pre-baking the pie crust in the proper pan. This is not a short crust but a flaky crust that most of us Americans use for all pies.
  2. making too much pastry cream and not letting it cool before filling the pie crust.
  3. not cooking down the jam and cherries long enough to make a thicker sauce.

But how does it taste? Let’s find out.

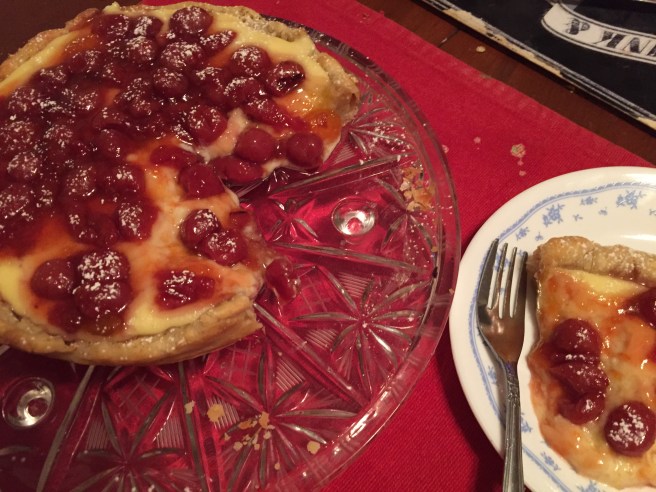
20160911_233612020_ios

Nice flavors. The custard was loose. Perhaps more time in the refrigerator will set it better. I will find out tomorrow. The crust was nicely colored and crisp on the bottom. Good bake! I have lots of pastry cream leftover so cream puffs may be on the menu this week!

Banana cake: baking season returns!

September has brought cooler weather. At least for a day or two. Never mind that the forecast shows 90s by the end of the week! Meanwhile I turn on the oven and bake a cake.

Ohiocook sends us over to the diabetic living website to check out dessert recipes. And there is this cake first thing: cinnamon banana cake with chocolate ganache: Cinnamon-Banana Cake

I have frozen bananas, cinnamon, whole wheat pastry flour, so here goes. I follow the recipe exactly except for the dark chocolate in the ganache because, for some reason, I don’t have dark chocolate in the house. Oh well, life in my kitchen must go on.

  • 2 cups all-purpose flour
  • 1/2 cup whole wheat pastry flour
  • 1/2 cup granulated sugar
  • 1/2 cup brown sugar
  • 1 1/4 teaspoons baking powder
  • 1/2 teaspoon salt
  • 1/2 teaspoon baking soda
  • 1 teaspoon cinnamon
  • 2/3 cup mashed bananas; I used 2 whole frozen bananas
  • 2 eggs
  • 1/4 cup canola oil
  • 3/4 cup non-fat milk; I used cashew milk
  • 1 teaspoon vanilla

Mix all the dry ingredients. Mix all the wet ingredients. Add wet ingredients to dry ingredients all at once and mix till combined.

Oh, you would have preheated the oven to 325 F  and have generously greased a Bundt cake pan. Spread evenly in the pan and bake for 45-55 minutes. Mine took 50 minutes. I thought it would take longer because of the frozen bananas but it was a good looking cake at 50 minutes. Let cool completely and then frost with ganache.

I had to rescue the ganache! The ganache was made with 3 ounces German sweet chocolate and 1/4 cup half and half. Melt the chocolate and stir in the half and half. Well, this was a grainy mess. Very unappealing! Somewhere I remember in my cookbook rambling that chocolate could seize and there was something the cook could do about it. The internet is a life saver for modern day cooks. In the olden days one could call up the grandmother or even ask a neighbor over the back fence what to do, but not in these times. So I put “rescue the ganache” into the search engine and voila! First aid arrived. All the sites said the same thing: heat up a low fat milk and slowly incorporate that into the split ganache. Something about water molecules, etc., would solve the problem. And it did!

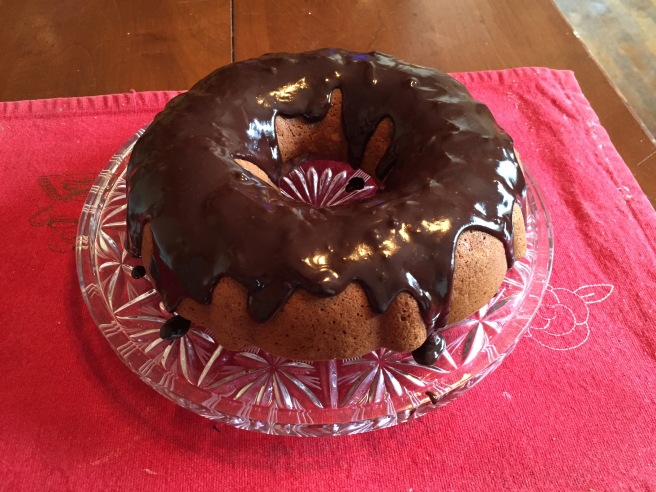
Here’s the final product. It looks very much like the picture from the recipe website. How often does that happen?

20160905_202042535_ios

This cake is not too sweet and Hubby and the ganache complements it well. Yum!

Been camping!

Summer has been difficult for me to come up with creative things to cook. There have been a lot of repeats: barbecue sauce, ketchup, tuna noodle salad, and plain old grilled hamburgers and Italian sausages. Baking is rare since I do not have air conditioning in the house and turning on the oven heats up everything. But now that fall is around the corner I will want to bake bread and cakes, even though I don’t have enough people around to eat the cakes!

We got a new camper trailer! Yea! This one we designed specifically for us. This means we chose the options and the layout that we wanted. The big trip to Niagara Falls has come and gone. It was fabulous! If you’ve never been, go!

20160823_155848893_iOS

I thought I would share a few of the meals we cooked while camping. This is just camp fare, nothing to write home about!

20160821_130315585_iOSI baked muffins (from a mix) in the camp oven. They did not rise high and I think that is because the oven runs cooler than the temperature on the dial.

Camp goulash used up the leftover elbow noodles (the first half went into tuna noodle salad for our picnic earlier that week), a can of tomatoes, a can of mushrooms, diced onion, pesto, oregano, salt and pepper. And shredded cheese. This is served along side grilled Italian sausages and bakery bread.

And then there is The Last Supper: farmer’s market new potatoes, sliced and diced onion, cut up breakfast sausage patties, cheese, herbed butter, and ground pepper. Packet those up and cook on the grill for about 15 minutes. Yum!


Honey Oatmeal Muffins

Again I am using the Quaker Oats 1982 cookbook. I am not sleeping well and there are fresh blueberries languishing in my refrigerator. So I make and bake muffins in the middle of the night!

I choose this recipe because all I have is almond milk and am not sure if non-dairy milks can be substituted in baked goods with perfect results. I used almond milk in an egg custard once and it did not set as expected. But this worked out. The recipe called for 1/2 cup milk unlike my other favorite muffin recipe which called for one cup. This also uses vegetable oil so I imagine they are healthier than those made with butter.

  • 1/2 cup milk
  • 1/4 cup vegetable oil
  • 1 egg, beaten
  • 1/4 cup honey

Mix the wet ingredients together in a 2 cup measure or other smallish bowl.

  • 1 1/2 cups oats, uncooked
  • 1 cup all purpose flour
  • 1/3 cup brown sugar, firmly packed
  • 1 tablespoon baking powder
  • 1/2 teaspoon salt

Mix the dry ingredients together in your mixing bowl. To this I added 1 heaping cup fresh blueberries and 1/2 cup chopped pecans. Stir gently.

Add the wet ingredients to the dry ingredients, stirring just until mixed. Bake in greased or papered muffin pan at 400 degrees F for 15-18 minutes. Makes 12.

Enjoyed these for breakfast. I will make these again.

20160811_033251497_iOS

The herbal experiment…or Scarborough Fair Veg!

Sing along with me…parsley, sage, rosemary, and thyme!

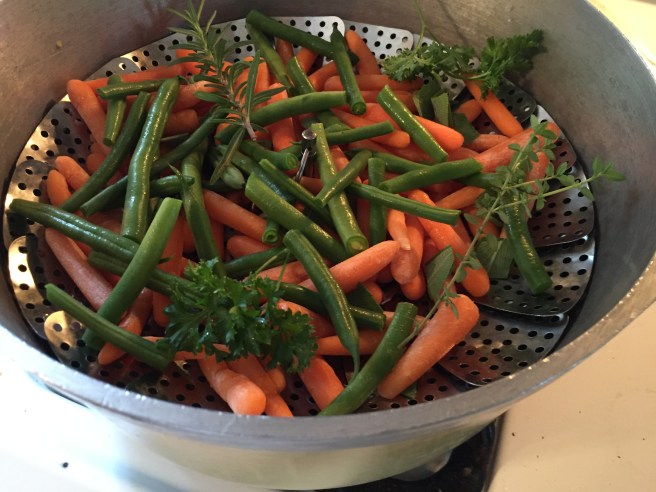
I was planning to steam some farm fresh green beans to have for dinner as the two girls would be home with us. I had some very thin baby carrots and thought those would work well in combination with the beans. Then I wondered how to add flavor. Fresh herbs! Why not, I have some growing right outside my kitchen door.

Looking at my herb garden I wonder what to use. I used basil with peas before so I want to use something else. Sage. I have no idea what to use fresh sage with so I’ll see if it works with beans and carrots. I select six nice sized sage leaves and cut them up and sprinkle them on top of the carrots in the steam basket. As I am preparing the green beans, I think to myself…parsley, sage, rosemary, and thyme! I step out my back door and pluck some fresh herbs.Actually I snipped them with the kitchen shears.

20160810_211622608_iOS

more green beans get piled into the pan than shown

I used a small bag (one pound?) of mini baby carrots and a batch of fresh green beans that when trimmed equaled about 2 cups. For the fresh herbs I used six sage leaves, a four inch sprig of thyme, a four inch sprig of rosemary, and a few snippets of parsley.

I steamed these for about 7 minutes. I did not keep good track of the time. I had not researched how to use sage and after preparing the pot for cooking I thought I should have kept the leaves whole like the additional herbs.But by that time they were buried beneath.

These get served with grilled pork loin chops seasoned with a Chicago steak seasoning that my son left here before going off to his Alaskan adventure. I put the jars of chimichurri,  A dog fight of flavors!, and plum sauce, Supper, on the table for people to pick for topping their pork. And didn’t Hubby do fabulous grill work on those chops?

20160810_220232580_iOS

The herbs gave a very subtle flavor to the vegetables. I liked it; the others were indifferent.

Blueberry Pie

Hubby and I took a Sunday drive to look around some of the local campgrounds to see if any looked inviting for weekend camping trips. It is the second half of the season for camping and I may or may not find a Labor Day weekend spot but it is worth the effort. In the rural areas of this small state there are farms and farm stands. We found one that also is a new winery with a wine tasting happening so we had to stop! And because they took “plastic” for payment I bought plenty of fresh locally grown produce and homemade preserves and a fancy bottle of wine!

They had only four pints of blueberries left so I bought two of them. Pie, I was thinking! I had two discs of pie dough in my freezer so this should be easy! Easy as pie! 🙂

I do not like to cook up the fruit before filling the pie crust. I also wanted to use just one pie crust and fold it over the top of the fruit so it looks rustic. I am not sure what that is called but I’ve always wanted to try it.

  • one pie crust, unbaked and rolled out to a 12 inch circle; I love the apple cider pie dough recipe here.
  • 3 cups blueberries
  • 1/2 cup sugar
  • 1 tablespoon cornstarch
  • 1 tablespoon lime juice; I read some time ago that lime is nice with blueberries so i thought I would try lime instead of lemon juice

Heat oven to 400 degrees F. Roll out crust and place in 9 inch pie pan. Mix the fruit with the other ingredients and pour into the crust. Fold the crust over the fruit filling. Bake for 35-40 minutes.

I also sprayed the crust with butter flavored cooking spray and sprinkled on some sugar before baking. I figured this would make a nice golden brown.

And here is the final product:

20160808_001618315_iOS

The filling was a bit runny. This may be because I cut it when it was still warm. But it tasted good and fruity. The filling broke through the crust so I would not be able to pull it out of the pan to place on a serving plate. Did I roll the crust too thin? Hmmm?