Breton Butter Cake my way!

The weather has cooled down a bit and baking seems like a good idea. I have been going through my magazines and marking the recipes I want to try, one of which is a French butter cake. This I found in January/February 2017 edition of Cook’s Illustratedhttps://www.cooksillustrated.com/articles/368-french-butter-cake?incode=MCSCD00L0&ref=new_search_experience_1.

I forgot to find Californian dried apricots while shopping so had to decide what type of filling to make. I looked into my  French Feasts cookbook and found some tasty sounding fillings for gateau roule. And then I just took out an open jar of lemon curd and decided to use that one. Now also in this book is a recipe for Breton Butter Cake. This one is not filled. I compared the recipes and decided I would try the French Feasts‘ recipe but use the magazine’s techniques. And this would allow me to use my  8-inch cake pan with the removable bottom. Yay!

  • 2 2/3 cup all-purpose flour
  • 1/2 cup sugar
  • 2/3 cup soft brown sugar
  • 1/4 ounce yeast (2 1/4 teaspoons)
  • 1 cup salted butter (I used unsalted butter with every intention of adding one teaspoon salt, but forgot to add the salt!)
  • 4 egg yolks (3 for the batter and 1 for brushing on top)
  • 2 tablespoons rum

Yeast in a cake! And no rising time! How will this turn out?

  1. Mix together the flour, sugars, and yeast. Grate the cold butter and add to the mixture along with three egg yolks and knead together. This will be crumbly. Well, I cut the butter into tablespoons and chopped it up a bit and put it in the mixer bowl. I then added all the other dry ingredients and mixed it up in the Kitchen Aid stand mixer. This got crumbly and I added the egg yolks and rum. It then came together into a stiff batter.
  2. Place a sheet of parchment paper in a tart pan than is about 8 inches in diameter and spread the dough over its base. Beat the remaining egg yolk and brush it on the dough. Ridge the dough surface with a fork. So I followed the magazine and spread half the dough onto the base of the pan. I then spread the 1/2 jar (about 6 ounces) of lemon curd on the base to about 1/2 inch from the edges. I placed this in the freezer for about ten minutes. Per Cook’s this will freeze up firm enough to put the second half of the batter on top. I forgot completely that lemon curd does not freeze firmly. Oops! I then attempted to spread the second part of this dough on top. I should have rolled it out into an  8-inch circle and put the whole thing on top all at once. Live and learn. I had to put pieces around the edge to stop the lemon curd from spreading to the edge. I did my best and then brushed the top with egg yolk and ridged it with a fork. IMG_0218
  3. Bake in preheated oven 400 degrees F for about 25 minutes; then lower the temperature to 350 F and continue cooking for 15 minutes. Allow the cake to cool in the oven with the door open. I baked it as directed but decided to let it cool on a wire rack for 30 minutes per Cook’s. The cake was ready to have the pan removed right out of the oven, no need to run a knife around the edge to loosen. IMG_0219
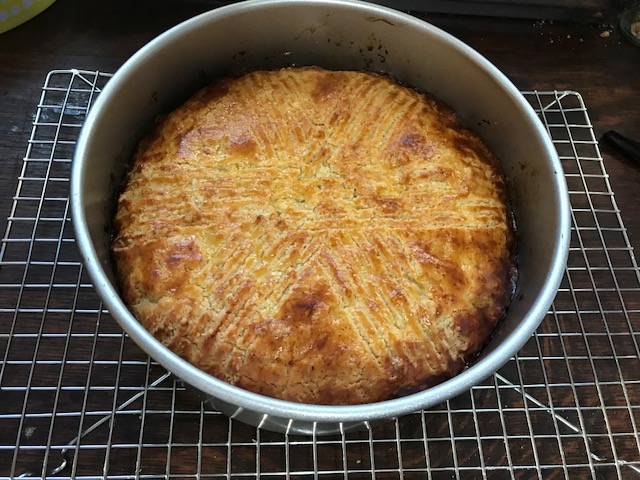
  4. When the cake is lukewarm, wrap it in foil. This cake is better when it is not so fresh–the day after, or the day after that. We cut this baby up after the 30 minutes! IMG_0226Actually we waited a bit longer and cut and ate a slice while we were watching a Poirot mystery set in the French Riviera. That seemed appropriate.

I first was concerned that it was not fully baked around the filling but this was hard to tell given the lemon curd was not distinct from the rest of the cake. It was firm on the outside, top, bottom, and sides. it was dense. It tasted delicious!

And how did it taste the next day? Still delicious. A little gummy but that gives it a fudge-brownie type texture. The lemon filling is marvelous in this cake. The outside of the cake gave it a shortbread type of feel. It is definitely not the American butter cakes I grew up baking and eating. But this I will make again.

Supper: Quinoa and vegetables

Do you ever have those days when you think about eating healthy, exercising more, etc.? I spend a lot of time thinking about what food to make that is healthy and will help us improve our cardiac conditions and cholesterol numbers, lose a little weight, and feel better overall. I think about brown rice, quinoa, chia seeds (what am I going to do with those chia seeds in my pantry?). I think I may even engage in fantasy thinking in that if I think hard enough about losing weight, I could actually lose some poundage. And then I watch the Great British Baking Show, get a new Cook’s magazine, and see interesting looking baked goods in my FB feed. What to do?

In my pantry there is healthy food. I found this fabulous quinoa/rice mixture that cooks up in ten minutes. Yay! No rinsing required.  I figured I should make a casserole or salad of some sort. I found two fully cooked turkey drumsticks in my freezer and some homemade broth. I have a package of frozen tri-color peppers and onions. I could assemble this all together and that would be supper.

IMG_0178

Ingredients are approximate amounts: Serves 4

  • 4 servings quinoa/rice mixture (made by Minute Rice), cooked according to package
  • 1-2 tablespoons olive oil
  • 1 cup mixed peppers and onion strips
  • 1 cup broth
  • about 2 cups diced cooked turkey from two drumsticks
  • 1 cup frozen peas, added at the last because it looked like it needed more vegetable and more color

Easy directions: saute peppers and onions in the olive oil in large enough skillet to accommodate the quinoa mixture as well. Stir in the turkey then add the cooked grains and 1/2 the broth. Stir to mix on low heat. Add the frozen peas and the rest of the broth; stir on the heat for a few minutes then turn off heat, cover skillet and let sit for 5-10 minutes. I let it sit to steam the peas a bit and because Hubby wasn’t home yet.

If your broth is seasoned that might be sufficient with some salt and pepper. I added a pinch of tandoori seasoning but that was not adequate. Hubby ate his with a healthy sprinkling of Worcestershire Sauce. Me, too, and that did the trick.

This is a basic casserole with meat and grains and vegetables. Any of these three ingredients can be changed up at whim and/or depending on what you have on hand. My mother would throw all the leftovers in one pot and cook them…usually she would over-cook them. Sorry, Mom, but that’s the way it was!

Blueberry Breakfast Cake

This looked very interesting on the King Arthur Flour Facebook feed so I set out to make it. Believe it or not, I followed the recipe exactly except I used a non-round pan to bake it.

IMG_0094

This is the link to the recipe: Blueberry Breakfast Cake. This recipe uses sour cream and cottage cheese with 3 eggs and some sugar and flour. There is a custard like layer on the bottom with the fruit on top. The cinnamon-sugar topping gives it a nice crunch.

  • 3 large eggs
  • heaping 1/2 cup sugar
  • 6 tablespoons melted butter
  • 1 cup small-curd cottage cheese
  • 1 cup sour cream
  • 1 teaspoon vanilla extract
  • 3/4 cup all-purpose flour
  • 1/2 teaspoon salt
  • 1 1/4 teaspoons baking powder
  • 1 1/2 cups blueberries, fresh
  • cinnamon-sugar, for topping

Heat oven to 350 F. Spray a 9 inch pan with cooking spray. The pan needs to have 2 inch sides. My pan is about 10 x 7 inches. Beat the eggs with the sugar then add the butter, cottage cheese, sour cream, and vanilla. Mix in the dry ingredients. Pour into the prepared pan and sprinkle the berries evenly on top. Bake for 50 minutes. A toothpick inserted into the center should come out clean. Sprinkle the cake with a generous amount of cinnamon-sugar. Let cool for 30 minutes before serving. IMG_0095

Ginger Chicken in Crock-pot

Hubby and I were driving on Main Street and noticed a Thai ice cream shop. So he says “ginger ice cream is really good”. Somehow the conversation ran on to ginger chicken, and then we ordered Chinese take-out after our camping weekend. This all inspired me to actually cook something other than chicken thighs on the grill and/or hamburgers and/or tuna noodle salad. So here is my version of Ginger Chicken with Vegetables and Rice. The amounts are approximations as I did not measure. This is why I am not writing a cookbook. No editor worth her salt would let this pass!


Get out your handy dandy crock-pot and supper will be ready when you get home from work. And the oven doesn’t have to heat up the house.

  • 4 chicken breasts; these were four medium-sized frozen ones
  • thumb sized chunk of fresh ginger root, peeled and minced
  • one onion, diced
  • 3 medium carrots,sliced
  • 1/4-1/2 cup broth
  • a good sized squirt of Dijon mustard
  • at least one Tablespoon of honey
  • a shake or two of garlic powder; ideally one wold use minced garlic but I forgot about the garlic until I was putting the lid on the pot.

I put all of the above in the crock-pot, vegetables on bottom, and cook on low for 7-8 hours. When I got home from work I added the following:

  • 1/2-3/4 cup frozen mixed peppers; if I had fresh I would have chopped these and put them in at the beginning.
  • 1/2-1 cup frozen green peas
  • 1/2 pint leftover rice from the Chinese restaurant

Stir this to mix all and continue to cook on low (or high) to get everything hot, about one more hour. I served this in bowls and had leftovers for the next night.

IMG_0089

So this is how I cook. I throw things together. The above could be made with all fresh vegetables if you have them. The rice could be kept separate or left out altogether. You could use more broth if you like a more soup-y dish. One could serve it with soy sauce. I will probably make something like this again but it won’t be exact. Most of you home cooks out there do this same thing.


Two years blogging!

This was a perfect day for baking.  The weather was downright chilly after a week of sweltering heat. I had printed this recipe earlier in the month and this was the day to use it. So for the anniversary blog I have made the July Bake Along Recipe from King Arthur Flour: Blueberry Hand Pies. Now I have made hand pies before: Pork Pies. But this is summer and the berries are in season and blueberry pie is so good! I had anticipated changing the recipe when I got down to making these, but I followed it exactly! That’s probably a first. I had recently bought some tart pans and thought I would make these into individual tarts and I was even thinking of making my own standard pie dough or using store bought: oh my!

I gathered the ingredients for the pastry and got out my food processor with its brand new blade that I waited 6 months for Cuisinart to replace for safety reasons. This is the part of the recipe that I did not follow. The food processor makes making pie dough simple. I never liked making it by hand.

PASTRY

  • 2 cups unbleached All-Purpose Flour; I had exactly two cups; I thought I might have had to use some whole wheat pastry flour, but I had just enough.
  • 3/4 teaspoon salt
  • 1/2 teaspoon baking powder
  • 1 cup (16 tablespoons) cold unsalted butter
  • 1/2 cup cold sour cream

I pulsed the dry ingredients and then added the butter and finally the sour cream. It does come together in clumps as described in the recipe. When I dumped that onto my lightly floured board and read the description of rolling this out, it dawned on me that this is a puff pastry. Most likely a rough-puff as it only has two turns: rolling out, folding over, rolling out again, repeat, fold over, and chill for 30 minutes. My cutting board block is marked in two inch squares so I measured it to the 8×10 inches both times.

FILLING

  • 2 cups fresh blueberries
  • 2 tablespoons cornstarch
  • 1/3 cup sugar
  • 1/8 teaspoon salt (a large pinch)
  • 1 tablespoon lemon juice

Rinse berries and put in saucepan. Mix the dry ingredients and pour over. Add the lemon juice and cook, stirring occasionally, for about 5 minutes. My filling began to thicken in about 3 minutes over medium-hot heat so that is how long I cooked it. I don’t usually cook the blueberries before putting in pie. But this does help hold the filling together for the small squares of pastry. Let cool. I let the filling cool but not quite to room temperature. And I have leftover filling. This could be good on pancakes or to top ice cream. I will use it to top Brie cheese!

Preheat oven to 425 F and get that pastry out of the fridge and get ready to roll!

Here again I found the markings on my cutting board block helpful. Roll the pastry into a 14 inch square. Then cut it into sixteen 3 1/2 inch squares. My squares were not squared completely nor were they cut to the exact size. Put a heaping tablespoon or two on eight of the squares. Brush the edges with beaten egg. Oh yeah, make a vent in the other eight squares. Then put together and press the edges with the tines of a fork. Brush the rest of the egg yolk on the tops and sprinkle with sugar. And they are ready for the oven.

20170724_213849481_iOS
Looking good so far…

Bake for 18-20 minutes until lightly browned. When I took these out I was in awe…

20170724_215844358_iOS

And they taste great. I am not sure how to share this with the King Arthur website for the bake-along so I will be content sharing it with you who read this.

Many blessings to all!

Tabbouleh

I am making cold salads to eat all week since it is hot, humid, and hazy. First was the standard and ever popular tuna noodle salad, and now Mediterranean Tabbouleh. This is an adaptation from the recipe on the back of the grains package.

20170713_104123834_iOS

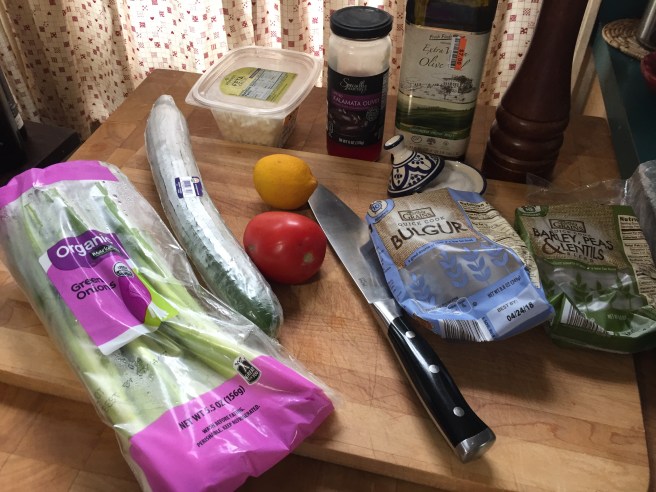
What you do not see in the picture above are the fresh herbs I added: 3-4 sprigs parsley and leaves from two large Greek oregano sprig.

The package recipe was for Bulgur but I only had enough for 1/2 cup so I used 1/2 cup of the barley mix as well. Cook the grains as directed on the package. I doubled the vegetables and added the feta and olives.

  • 1 cup Bulgur wheat or mixed grains, cook as per package; these quick cooking grains from Aldi cook in 10 minutes.
  • 1/2 English cucumber, sliced and diced
  • 1 large plum tomato, seeded and diced
  • 1 large green onion, greens and white parts, chopped
  • 8-12 roughly chopped pitted kalamata olives
  • 1/4 cup crumbles feta cheese
  • zest and juice of one lemon
  • fresh herbs, about 1/4 cup minced, I used parsley and oregano.
  • 1-2 Tablespoons of olive oil
  • salt and pepper to taste

After the grains are cooked, stir in the chopped vegetables, herbs, zest and juice. Add the olives and feta cheese and drizzle with the olive oil. Stir together and serve. I served this over a bowl of torn romaine leaves.

20170713_222727396_iOS

The whole grains make this nice and filling. I was going to serve sliced avocado with it as well, but we saved that for dessert and mixed it with a bit of sour cream, more diced tomato, garlic powder, lime juice and ate it with tortilla chips!


Fresh Fruit Tart, Revisited

This is the same basic recipe from Fresh Fruit Tart. I made a few slight changes and I used farm fresh strawberries.

We went camping and the campground is just down the road from a farm market. This farm makes the best jams and jellies, and also makes fruit wines. Those are surprisingly interesting and rather good. No grapes allowed. Last year was cherry, this year is blueberries and apple. And it is not at all the Boone’s Farm Apple Wine from high school!

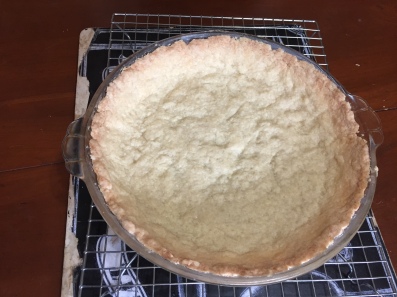
20170618_232216046_iOSI am thrilled! I made the perfect pre-baked tart shell. I thought the previous crust was a bit greasy with 10 Tablespoons of melted butter. So this time I used 8 Tablespoons and melted it in a small skillet. Even though it did not brown it was more cooked than simply melting it in the microwave. I made sure I pressed the sides to the top rim of the Pyrex pie pan and again baked it on a rack in a rimmed baking sheet, 30 minutes at 350 F.
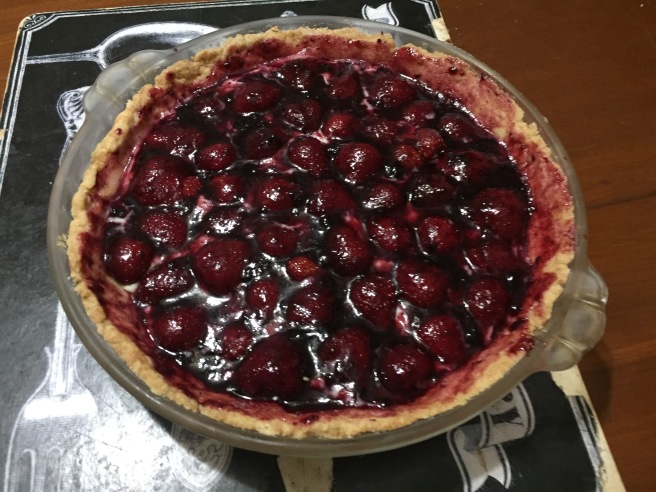
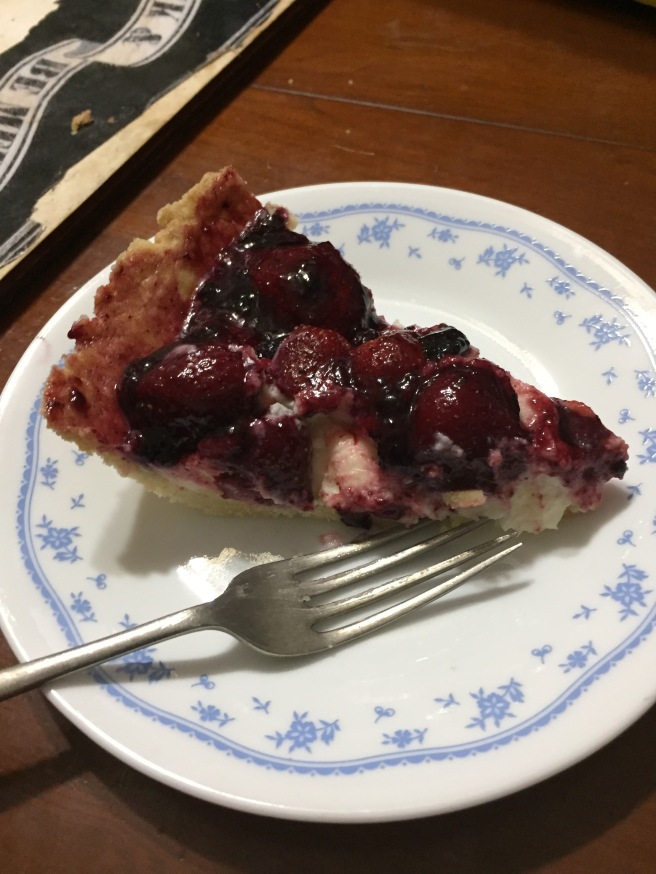
The most labor intensive part of this dessert is cutting the fruit. I cut about 1/2 quart of strawberries in halves. These strawberries are sweet and very red. None of those white cores to cut out like supermarket strawberries.

For the custard I used a combination of lemon and lime zest and the juices from one each. The original recipe calls for 7 teaspoons but I did not bother to measure. I also used 1 cup mascarpone cheese instead of the 3/4 cup in the recipe. This carton of cheese was firmer than the first one I used.

Letting the crust cool completely takes patience. I wanted to go ahead and make the cream filling but patience is a good thing. The no-cook custard-y filling must be poured into a completely cool crust.

I did not artfully arrange the berries. I put them in concentric circles just the way the Cook’s Illustrated article said made it difficult to cut the tart without cutting the berries too. Oh well! As I was putting the berries on the tart I remembered one is supposed to glaze the tart with apricot jam mixed with a teaspoon of the lime juice. I still don’t have apricot jam. But I do have this fabulous Black and Blue from the farm market made with blueberries and blackberries with crushed fruit in it. Yum! I put about 1/4 cup into a Pyrex ramekin with a bit of the citrus juice and nuke it for 30 seconds. I brush this on quite heavily and the top now looked darker than the bright red berries. I also brushed a bit around the crust. This goes into the refrigerator for 30 minutes to chill.

20170619_005455385_iOS

Hubby declares this the best tart ever (or yet); I don’t remember exactly.

  • crust is crisp and slightly sweet
  • the custard-y filling is not too sweet; it is creamy yet set
  • the farm fresh berries were fabulous
  • the heavy glazing with the other berry jam added flavors to the fruit topping

20170619_005654612_iOS

Fresh Fruit Tart

Okay, folks, I really, really, intended to follow the recipe to the “t” but just didn’t. What can I say?

Cook’s Illustrated July/August edition has a test-kitchened version of the fruit tart, you know, the kind you see in the bakeries each summer when the berries come into season. The kind on a layer of pastry cream or pudding. This new and improved version is supposed to stay together when cut in filling and crust. Hubby thinks this type of fruit tart is a great thing so I intend to make this. It has a pat-in-the-pan crust and a no-cook filling. Sounds easy to me.

I traipse off to the store to buy mascarpone cheese and white baking chips. Yes that’s what is in this, along with lime juice and zest. I’m cheap and just was at my local chain grocery so bought blueberries and strawberries which were less expensive (by a lot!) than raspberries and blackberries. No fresh peaches so I didn’t use those either. I forgot that kiwi makes a nice edition too, so just blueberries and strawberries for us.

The recipe is simple enough. It calls for using freshly sliced peaches to make an edible slicing guide. Good idea. It added lime to the filling to give it oomph. And the white baking chips hold the cheese filling together without cooking.

  • 1 1/3 cups flour (I read this wrong and used 1 1/2 cups.)
  • 1/4 cup sugar
  • 10 Tablespoons unsalted butter (can be browned in a skillet, stirring frequently, for 2-3 minutes. Watch carefully as it can burn.)
  • pinch of salt
  • 2 Tablespoons water (apparently browning the butter cooks off a lot of liquid which is needed for the flour to hold the crust together.)

So I make the crust, almost exactly. I did not brown the butter to give it a nutty taste. I melted the butter, added the water, the flour mixture, and patted it into a 9 inch Pyrex pie pan. The tart pan I have does not have a removable bottom and is about 12 inches in diameter. I thought that would be too big. Now, thinking about it, it might have worked anyway. And I may not have needed to add the whole 2 Tablespoons of water.

The crust gets baked in a 350 F oven for 30 minutes, turning half way through. It is also baked on a wire rack placed in a rimmed baking sheet. Let cool completely. Note to self: this may be the way to bake pies in the future.

I cored then cut supermarket strawberries in half and washed 1/2 pint of blueberries. The glaze is supposed to be made from apricot preserves but when I opened the jar, I found that the little bit left was not fit for human consumption. Into the compost bucket with it! All I have now is dark jellies. I consult with Hubby and we agree that I can use the dark jelly for a glaze since I am using berries anyway. We have a wonderful berry preserve from a local farm and it is made from blackberries and blueberries. Cook’s calls for 1/3 cup. I use about 1/4th.

Meanwhile for the filling.

  • 1/3 cup white baking chips
  • 1/4 cup heavy cream (I bought and used whipping cream because I would have more uses for the remainder in the pint carton.)
  • 1 teaspoon grated lime zest plus 7 teaspoons juice (This supposedly needs two limes. Well, the zest from one lime was a tablespoon and the juice was a few teaspoons at best. I figured the extra zest would make up for the juice and only used one lime. After all, one needs them for Lime Rickeys and G&Ts!)
  • 6 ounces mascarpone cheese at room temperature. (I used 8 ounces because that was the size of the small tub that I found at the grocery store.)

I really did have every intention of following the recipe exactly. But as you can see from my notations above I did not.

Melt the baking chips with the zest, a pinch of salt, and the cream. Do this in the microwave for ease. It took less than a minute to melt it to a smooth consistency. Now add 1/3 of the mascarpone and whisk. Then add the 6 teaspoons of lime juice and the rest of the cheese. Whisk til smooth and pour into the completely cooled crust. Arrange fruit as desired.

20170611_184946938_iOS

Melt the preserves with a little lime juice (this teaspoon came from a jar) and carefully glaze the fruit avoiding the crust. Well, this is easier said than done. As mentioned above I had a dark glaze and there were gaps between the fruit. This is to be put in the refrigerator for 30 minutes.


So did this new improved tart meet its goals? Yes it did. Life is too short not to eat dessert when it looks like this. I admit it is not as pretty as the ones in the bakery or the picture in Cook’s Illustrated. But it is in my kitchen ready to eat. And the crust and filling did not break apart or ooze out when cut. Yay! I see no need to let it sit out for 15 minutes before cutting, either. Also farm fresh strawberries will be tastier than supermarket berries. I will have to look out for some next time I pass a farm market or stand.

20170611_185110621_iOS

Your Standard Sour Cream Coffee Cake

Greetings! I am always so happy and surprised that you read what I write. I was going to be a poet when I was a teen, but I guess it was not my calling. I do love to write, so I am happy to have readers. Thank you! 🙂

So it was a gloomy summer day. And in my effort to suck all the joy out of life…oops! I mean in my renewed effort to breathe in all the joy that life has to offer…I thought I should make myself write a blog post weekly.

(Now that I have said “weekly” don’t hold me to it because…life happens, along with moods, and I don’t always like to make commitments!)

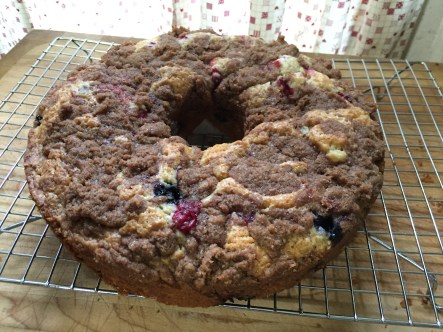
20170530_220846485_iOSA week or so ago I made a coffee cake for work. I did not have sour cream (or did not look for it in my fridge) so I browsed through cookbooks to come up with something. I made a blueberry buckle with blueberries and cranberries without the buckle. It had the fruit but it also had the streusel topping. I baked it in a tube pan so it really did not buckle. I think “buckle” is the way the fruit indents the top of the cake. The people at work loved it and here is a picture. This is basically 1/2 cup butter, 1 cup sugar, 2 cups flour, 2 tsp. baking powder, 1/4 tsp. salt, 1/2 cup milk, and one egg and 1 cup fruit.
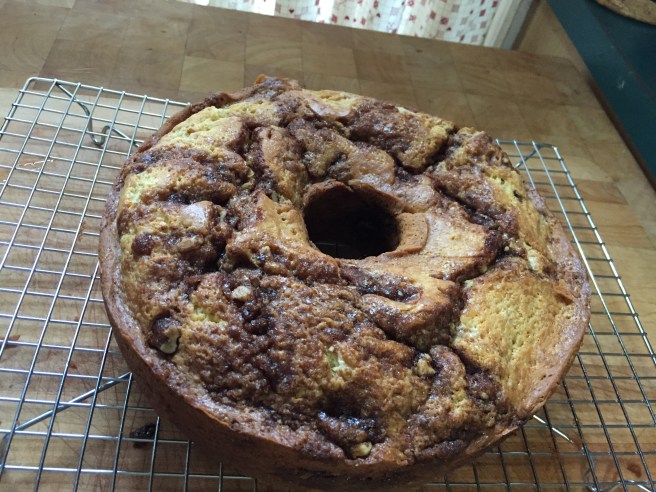
So on this gloomy summer’s eve, I figure it is a good baking day. I will make a sour cream coffee cake because I recently spied sour cream in my fridge. Where’s the recipe? I go to my Settlement Cookbook because it is full of standard baking fare from kitchens of generations of women gone by.

  • 1/2 cup butter
  • 3/4 cup sugar
  • 1 tsp. vanilla
  • 3 eggs
  • 2 cups flour
  • 1 tsp. baking powder
  • 1 tsp. baking soda
  • 1 cup sour cream

preheat oven to 350 degrees F. Spray or grease a 10 inch tube pan. Cream butter and sugar. Add vanilla. Add eggs one at at time. Sift dry ingredients together and add to butter mixture alternately with the sour cream.

Topping: mix 6 Tab. of softened butter (I accidentally melted mine) with 1 cup packed brown sugar, 2 tsp. cinnamon, and 1 cup chopped nuts.

Put half the batter in the pan. Sprinkle (or glob) on 1/2 the topping, layer the other half of the batter and the rest of the topping. Bake for 50-60 minutes. Let cool in pan 10 minutes before removing.

So the cake is in the oven, Hubby is at the dentist, and I am putting the dog out in the yard, going out to un-loop him from the various patio furniture and bushes at least three times, and thinking that this is a standard sour cream coffee cake that is probably found in all those cookbook collections that various churches and other organizations put together as fundraisers. So I peruse a few of those.

The first one I look through has Sour Cream Coffee Cake and the streusel is just sugar, cinnamon, and nuts. Cool! Because I knew that the streusel topping for my first coffee cake has flour in it and I thought that was pretty standard. So I continue reading this recipe and get to the end and see who submitted it. My sister! Gave me a little joy to see her name at the bottom of the recipe!

20170605_215255736_iOS
Sour Cream Coffee Cake

Ordinary cooking!

If you are like me, you, and mostly it is the woman—not to negate the men who do so, just go about fixing dinner without thought to innovation and creativity. Those of us who rarely use processed or prepared foods or take out fast-food, there is a general routine and rotation from pantry and freezer staples. What are yours?

In my kitchen pantry I usually have canned tomatoes, several types of canned beans, sometimes canned fruit, pasta of a variety of shapes, rice and grains, vinegar, oils, etc. in the freezer there is a variety of meats (fish filet, chicken breasts and thighs, small pork roast, the occasional rack of ribs, and burger patties) along with the various packages of frozen vegetables. Sometimes there are pie crusts or pie dough, frozen pirogi or ravioli, and the occasional pizza. We like the cheap but tasty pizzas available at the Aldi discount grocery store. Actually in my freezer I still have some venison sausage from the deer my son-in-law shot earlier this year. Breakfast strata anyone?

I don’t know how some of you are so creative all the time. I get tired, tired, tired! So I just make things up to cook, or to liven up the ordinary food. So browsing on Facebook I saw one of those videos on quickly preparing ginger chicken. I rarely pay attention to all the ingredients or the amounts or the directions.

So I try it on fish. Why not?

There is garlic (yes, I bought the jarred kind. My fresh garlic kind of got old and decrepit on me), fresh ginger root (this keeps in the freezer for millennia), soy sauce, and mixed vegetables on the side. I minced a nub of ginger root, added a pinch of garlic, and dumped that in the ramekin with some soy sauce. Trust me, I used those “exact” amounts! 🙂 I baked the four fish filet and brushed on the juice toward the end of the baking time. It smelled very good. I may have added a squeeze of honey as well.

So then I tried it on chicken…two chicken breasts, one onion, peas and carrots, and quick cooking mixed grains (from Aldi). This worked out well too.

20170530_213339191_iOS

Directions: dice chicken and cook through in a bit of olive oil. Mince the ginger root, bit of garlic, add soy sauce, a bit of honey, and add to the skillet with the chicken. The amounts depend on your taste. Separately I saute the onion in a bit of olive oil for a few minutes, then add the peas and carrots. Remove to a bowl. Cook the grains as per the package. I had planned to have a “rice pilaf” type dish as a side, but at the last minute dumped the almost cooked grains and the peas and carrots into the big skillet with the chicken. This I covered and let simmer a bit more until Hubby came home and dinner was served.