The Feast: the savory and the sweet

Happy Thanksgiving everyone!

IMG_0642
the savory
  • green salad (every item green) dressed with lime juice and olive oil
  • grilled steak
  • baked sweet potatoes
  • homemade rolls
  • mashed potatoes
  • autumn mixed-grains bake with butternut squash and cranberries
  • quinoa salad with dried apricots
  • sauteed mushrooms and onions in butter and red wine
IMG_0657
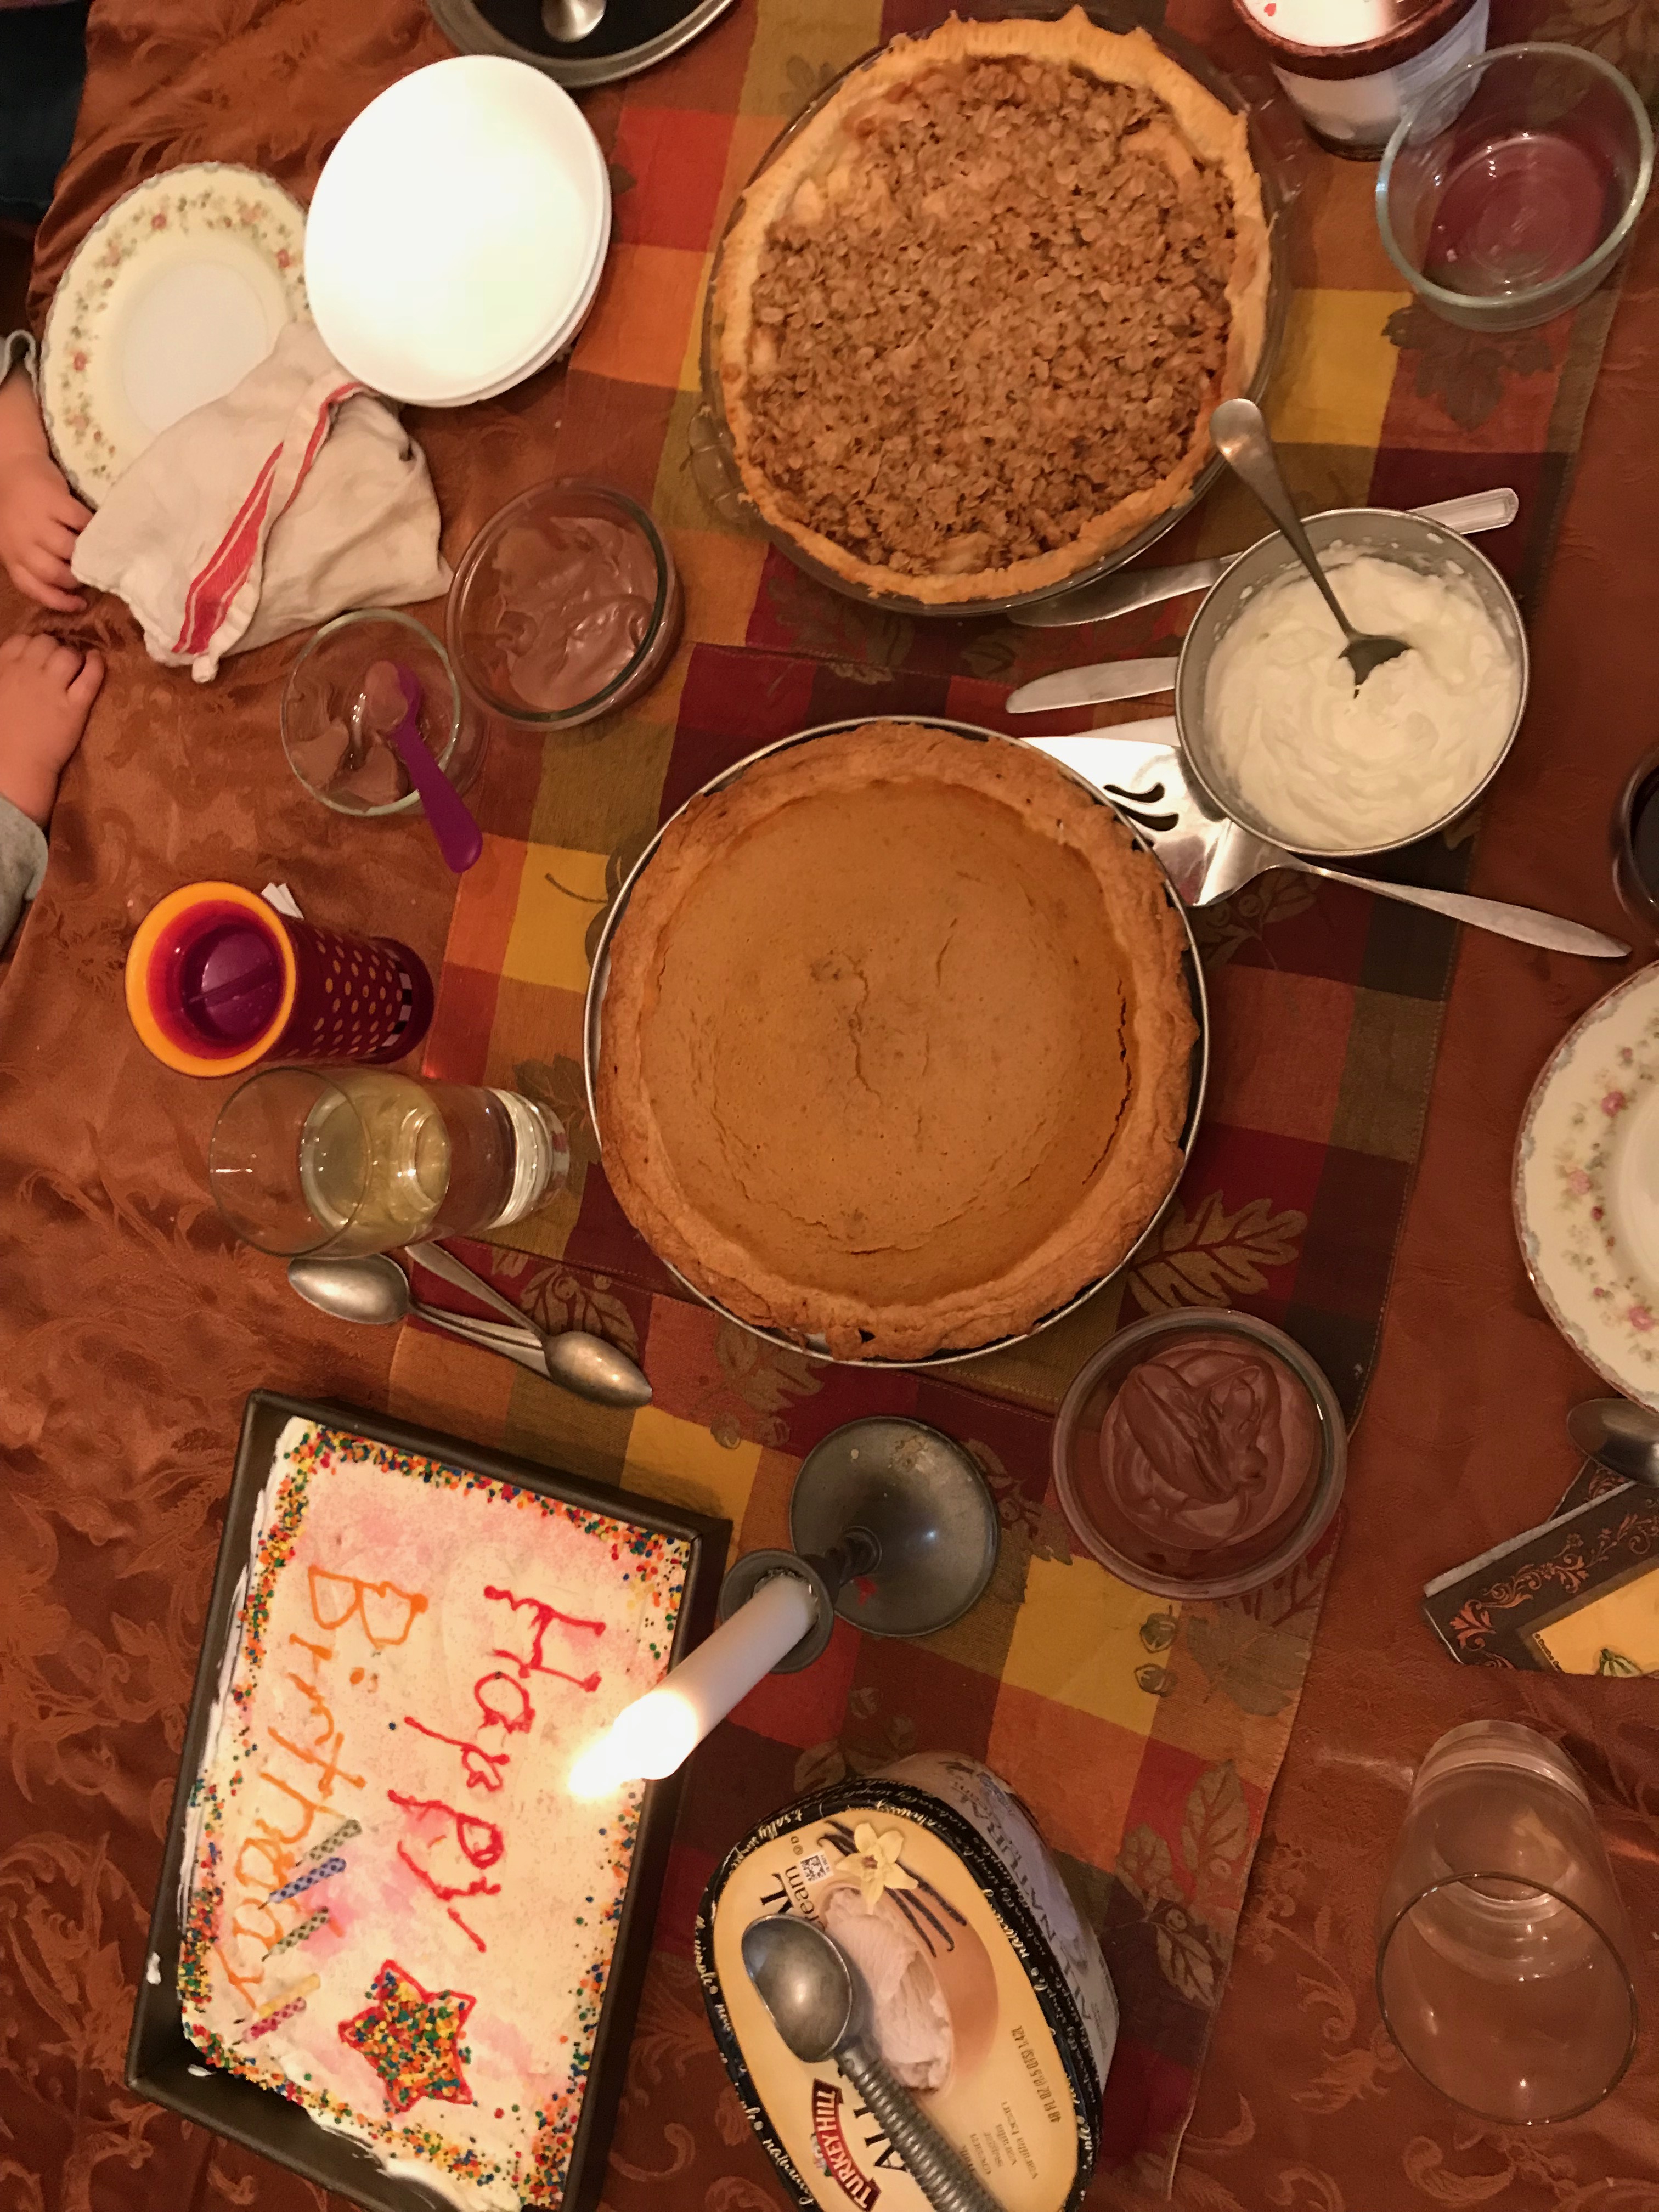
the sweet
  • rainbows sprinkles birthday cake from a box mix for the 4 year old and the 34 year old
  • vanilla ice cream with real ingredients anyone would recognize
  • tofu chocolate pudding for the dairy-free
  • pumpkin pie (the Betty Crocker standard)
  • apple pie with an oatmeal crumb topping
  • whipped cream freshly whipped from a carton of whipping cream (the bowl and whisk kept in the freezer beforehand)

I am thankful that we have enough food, actually more than enough. I am humbled that through my church I can take part in feeding hungry people a spaghetti dinner every week. I am thankful that my son and daughter were home to join us for the pre-Thanksgiving Wednesday feast this year. I am thankful for a loving Hubby, our home and our neighbors, our jobs, and our pets Leo and Squeaky.

I am thankful for all you who read my blog. I am thankful to get to know a little bit of each of you by reading yours.

And there are many more blessings I am thankful for. I will try to be grateful each day.

Happy Thanksgiving to you all.

Salisbury Steak

A while ago a colleague gave me her recipe for Salisbury Steak. Recently another colleague said that was what she was going to try to make for dinner. And then one of you lovely bloggers posted a recipe for them cooked in a crock pot. You know who you are koolaidmoms! And then Hubby bought a package of ground beef when we were grocery shopping. It seems the stars were aligned!

This is the recipe given to me by my colleague: Salisbury Steak with Mushrooms.

  • 1 lb. lean ground beef
  • 1/3 cup dry bread crumbs
  • 1/4 cup chopped onions
  • 1 egg, beaten
  • 1 teaspoon salt
  • 1/4 teaspoon ground black pepper
  • 2 cups beef broth
  • 1 large onion, thinly sliced
  • 1 cup sliced mushrooms
  • 3 tablespoons cornstarch
  • 3 tablespoons water

I cannot guarantee that I used the exact amounts listed but a pretty close approximation.

Combine ground beef, bread crumbs, chopped onion, egg, salt and pepper in a bowl until evenly mixed. Shape into four patties.

Fry patties in a large skillet over medium heat until browned on both sides, about 10 minutes. Add broth, sliced onions, and mushrooms. Bring to a boil. Reduce heat to low, cover and simmer for another 10 minutes. Transfer to plate and keep warm.

Bring onion mixture to a boil. Mix cornstarch and water in a small bowl. Add to the skillet. Cook and stir until gravy is thickened, about one minute. Pour over patties to serve.

I cooked brown rice and made a salad to complete the dinner.

IMG_0559
It’s all about the gravy!

Making Cheese!

I made Cottage Cheese! Why? Just for the experience. I had been browsing through Bittman’s cookbook How To Cook Everything and there it was, easy cheese making. Hubby thought this was a fun idea so we did it.

Outcome: not as creamy as Daisy brand. In fact, a little dry and bland. But easy!

Cost: Daisy brand costs from $2-$3 a pint carton. To make this is a bit more expensive so it is not something to do regularly.

I made half the recipe which made about half a pint.

  • 1 quart of whole milk ($1.25)
  • 1/2 quart of buttermilk ($1.25, this was the more expensive brand because that is all the grocery store had on hand)
  • pinch of salt (should have used a tablespoon of salt)

Line a strainer with three layers of cheesecloth. I inadvertently used six layers or so!

Put milk in heavy bottomed pot over medium high heat and bring just to a boil. Bubbles will be seen on the side of the pan, not all over. Then add the buttermilk all at once and stir constantly until the mixture separates into curds and whey. This takes but a minute. Remove from heat and stir in a large pinch of salt if desired.

Carefully pour the mixture through the strainer so the curds collect and the whey drains off. This is a lot of whey. I had to look up uses for it since I do not like to waste food.

For Cottage Cheese let this drain for 30-60 minutes until it is a dry as you like. I let mine drain for 45 minutes but next time, if there is a next time, will only do so for 30 minutes.

We scooped this up and stored it in an empty Daisy container. We added a little bit of the whey back into it hoping to make it creamier.

IMG_0573

Hubby saved a link to how to make one’s own Cheddar Cheese. We will have to try that too.


Banana Cake with Buttercream Frosting

IMG_0554

I made a cake and layered it and frosted it! This is a slightly adapted recipe from the larger KitchenAid Cookbook, not the one that comes with the mixer. I bought this one for $12.99 quite some time ago. The copyright date is 1992. Sister had just baked the pumpkin bread from this book which made me get my copy out to peruse.

I have a large bag of slowly browning frozen bananas. I have never cooked with frozen bananas. I am never sure as to why they turn brown if I have supposedly frozen them in airtight bags. So I used some of them and now have half a bag of slowly browning frozen bananas.

Cake:

  • 2 1/3 cups flour; I used 1 cup of whole wheat pastry flour in this amount.
  • 1 2/3 cup sugar
  • 1 1/4 teaspoons baking powder
  • 1 1/4 teaspoons baking soda
  • 1 teaspoon salt
  • 1 teaspoon pumpkin pie spice
  • 2/3 cup butter, softened or at room temperature
  • 2 1/2 frozen bananas to be about 1 1/4 cups mashed
  • 2/3 cup buttermilk; I only had 1/2 cup so added water to top it off
  • 1 teaspoon vanilla
  • 2 eggs
  • 1/2-1 cup chopped walnuts

I used the directions with the speed and timing for the KitchenAid stand mixer. So basically, sift all the dry ingredients into the bowl. Make a well and add the butter, banana, and 1/3 cup buttermilk. Beat to mix (Stir Speed for 30 seconds). Stop, scrape bowl. Turn to Speed 4 (high but not too high) and beat one minute. Add remaining buttermilk, vanilla, and eggs. Speed 2 for 30 seconds; stop and scrape; Speed 4 for one minute. Add 1/2 cup of the nuts at Stir Speed just until blended.

Pour batter into two 9-inch cake pans. I prepared the pans with parchment paper and sprayed that with cooking spray. Bake at 350 degrees F for 35-40 minutes. Cool in pan for 10 minutes, then remove and cool on wire racks.

Thoughts while making this…I often think that I should use my 8-inch cake pans in order to get taller layers. But the recipe said 9-inch. Sister told me she always doubles the nuts in her recipes so I did too. But I decided to put the extra nuts on top. While this was baking I hunted for my stash of cookie cutters thinking I had a maple leaf. I don’t. I was thinking of flavoring the frosting with maple syrup. I did not. I have always just used Speed 2 for mixing cake batters. But now I can go higher. Interesting.

For the frosting I also used the Speed and timing. This is very important for making fluffy frosting. Who knew?

  • 3/4 cup butter, softened
  • 2 cups powdered sugar
  • 1 1/2 teaspoons vanilla

Beat the butter at Speed 6 for 30 seconds. Stop and scrape bowl. Sift powdered sugar into bowl. I got out my sifter and actually did sift the sugar into the bowl. I do not use the sifter very often at all. Add vanilla. Speed 2 for 30 seconds. Stop and scrape. Then Speed 6 for two minutes. Voila, fluffy, spreadable frosting. Frost cake after it cools. I found some prepared icing gel tubes and thought I would be fancy. I dream of decorating fancy cakes. Not the most intricate of designs, nor was it as easy as I thought it would be.

But the test is in the taste. And this was very tasty and moist. I took a large portion of it to work so as not to eat a whole cake this week. Everyone raved about it. This recipe will be marked as a keeper.

IMG_0557


More chicken!

So now I am making Orange Chicken with Carrots and Chickpeas from that same 1991 Woman’s Day magazine. The food editor, this time, left out the carrots from the ingredient list! And since the liquids make this dish quite soup-y I am cutting down on the amount of chicken broth.

The chicken:

  • 3 chicken breasts
  • 2 tablespoons panko breadcrumbs
  • 2 tablespoons oil

Sprinkle breadcrumbs on the chicken, both sides. Cook in hot skillet with the oil for 6-8 minutes.

The vegetables:

  • 1 cup canned chickpeas; I used the leftovers from when I skillet-roasted a can of these with Middle Eastern spices. (great on top of salads!)
  • 1 cup shredded carrots; these are from one of those packages from the produce department; it’s all I had in the house.
  • 1 cup frozen peas; my addition; I plan to add more vegetables to everything we eat.

The liquids and seasonings:

  • 1 cup chicken broth; this is a decrease from the 3 1/4 cups called for.
  • 1 sprig fresh rosemary, leaves removed and minced roughly
  • salt and pepper; a dash of each

When the chicken have cooked for those few minutes add the vegetables to the skillet along with the liquid and seasonings. Cover and simmer for 30 minutes.

The finishing touches:

  • 3/4 cup orange juice whisked with 1/2 tablespoon cornstarch (original recipe called for one cup)
  • 1/2 can of mandarin oranges; again this is my addition

Remove chicken and vegetables from pan. Add the orange juice to the pan and bring to boiling. This will thicken into a sauce. I added the chicken and vegetables back to the pan along with the mandarin oranges. And kept this warm until Hubby came home from work. (I’ve been home from work for at least an hour; he has a longer commute.)

IMG_0550

This will serve as many people as chicken breasts used.


“Winner, Winner, Chicken Dinner”

I put the title in quotes in case it is copyrighted or something. Where did that expression come from anyway? Hmm?

Okay, I am back from my quick internet search…

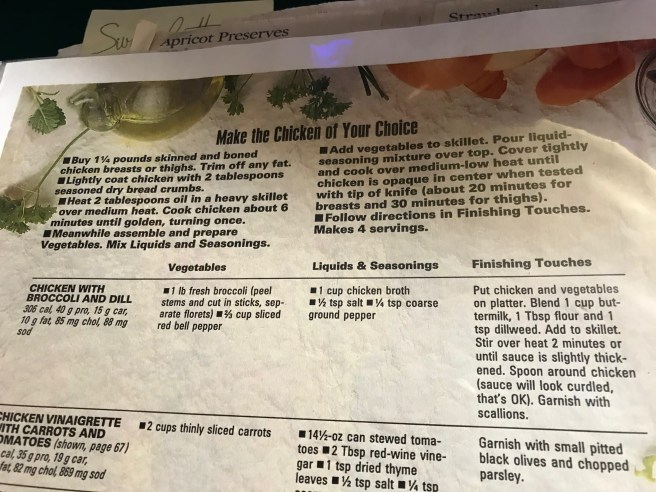
This recipe is from the 1991 Woman’s Day magazine article “Make the Chicken of Your Choice.” I made one of the seven choices before, Chicken Piccata. The choice for this dinner was Chicken with Broccoli and Dill. And as usual, I changed it up, just slightly.

IMG_0509

So the changes I made were using a mixture of vegetables that did include broccoli but also had cauliflower, carrots, and yellow and green squash. I did not have red pepper but had a frozen mixture of red and green peppers with onions. All told it was about 4 cups of vegetables. They were cut large. I also used only two chicken breasts and unseasoned panko bread crumbs.

  • slightly brown the chicken sprinkled with the bread crumbs in a skillet with 2 tablespoons of oil, 6-8 minutes
  • add vegetables and liquid and seasonings
  • cover and simmer for about 20-30 minutes; I simmered mine for longer just because I was waiting for Hubby to get home.

IMG_0510

  • I removed the chicken and vegetables; blended one cup buttermilk with a tablespoon of flour and teaspoon of dried dill weed.
  • Add that to the skillet and stir over heat until slightly thickened. Well, I added a bit more flour because this was quite soup-y. I then added leftover Chinese rice to thicken it further.

IMG_0511

This was delicious! It is basically poached chicken with different vegetables and flavorings. Who knew that poached chicken could be so good? I’ll make one of these “choices” next week. Stay tuned!


Is it too early for Gingerbread?

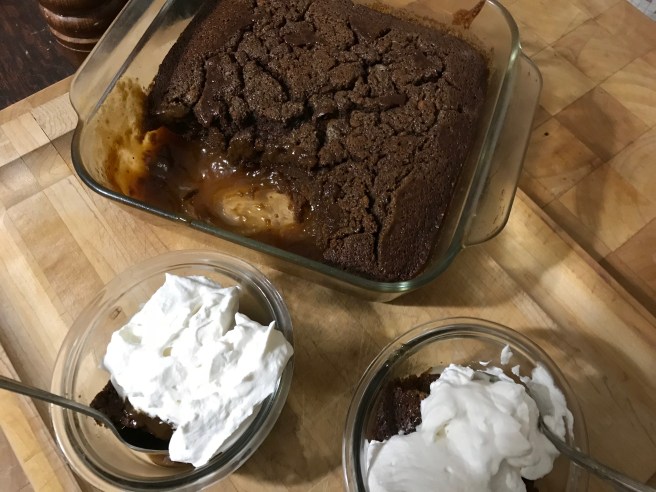
I had seen a steamed chocolate cake recipe on my Facebook feed and thought it would be interesting to try. New technique and all that. I got out all the ingredients and when testing the pans I found I did not have a large enough Dutch Oven. Shucks! I still wanted to bake something. So then I found another recipe I had saved from my Facebook feed and went to the good old faithful King Arthur Flour website. Thus I found myself making Gingerbread Pudding Cake. My mom used to make a chocolate pudding cake and I have made a lemon pudding cake and they are scrumptious. Here is the link: Gingerbread Pudding Cake.

  • 1 1/4 cups King Arthur Unbleached All-Purpose Flour
  • 3/4 teaspoon baking soda
  • 3/4 teaspoon ground ginger
  • 1/2 teaspoon ground cinnamon
  • 1/8 teaspoon ground nutmeg
  • 1/4 teaspoon salt
  • 1/2 cup molasses
  • 1/2 cup milk
  • 1 large egg
  • 1/4 cup unsalted butter, at room temperature
  • 1/4 cup granulated sugar

Instead of the separate spices I used the equivalent of KAF’s Gingerbread Spice mixture. I used 1/4 half & half diluted with 1/4 cup water for the milk. Everything else was as it should be. Preheat oven to 350 degrees F. Grease or butter an 8-inch square pan.

Whisk the flour with the spices with the baking soda and salt in a bowl. Set aside. Mix the molasses, milk and egg in another small bowl. Cream the butter and sugar together and add the flour mixture and molasses mixture alternately. Pour batter in prepared pan.

For the pudding mixture:

  • 1 cup light brown sugar
  • 4 teaspoons cornstarch
  • 1 1/4 cups hot water
  • 1/4 cup unsalted butter

Mix the brown sugar and cornstarch. Heat butter and water just until butter melts. This was about 1 minute in the microwave. Add liquid to sugar mixture. Pour carefully over the batter in the pan. Bake for 28-30 minutes. The cake part should test done.

IMG_0508

Serve warm. I served this with whipped cream. For leftovers, put scoop of cake and pudding (on bottom) into microwave safe dish/bowl and heat for 20-30 seconds, depending on the power of your microwave.

Enjoy!

Gateau Basque: another French cake

I’ve been on vacation camping in the Adirondacks, but I am back home. No more camping until next year.:(

Anyway, I was flipping back through the pages of my big French Feasts cookbook to look for the Breton Butter Cake  to make to take on vacation when meeting up with my sister. I wanted her and her husband to taste this creation. I find a recipe that is cake AND a filled cake at that. Is this the real French butter cake? I’ll have to make it and find out. The ingredients are basic cake.

  • 3 eggs
  • 3/4 cup sugar
  • 2 1/2 cups all-purpose flour
  • 3/4 cup butter
  • 2 1/2 teaspoons baking powder
  • 2 1/2 tablespoons light rum
  • 1 egg yolk for brushing on top
  • filling of pastry cream or jam; I used about 1 cup blackberry/blueberry preserves

Whisk the eggs and sugar until pale and thick. I did this with the KitchenAid stand mixer. Whisk the flour with the baking powder.


French Pound Cake: Quatre-Quarts

I love all things French! I have always wanted to speak the language. I took four years of French between High School and College but to no avail. I do recognize some words and phrases and enjoy knowing what Christie’s sleuth, Hercule Poirot, says from time to time on the Masterpiece Mystery movies. But, alas, I never was able to immerse myself into a French-speaking environment in order to learn to speak it myself. I can ask where the bathroom is, though, in a pinch!

On a beautiful weekend afternoon I wanted to bake a cake. Well, I wanted to bake a cake and use this new technique of making fluffy frosting with whipping cream in the food processor. But I did not really want to make chocolate cake. I get out various cookbooks and start browsing. I was all set to make a cake with apples and walnuts or walnuts and maple syrup or a pound cake. Hubby likes pound cake. He had suggested a carrot cake but I did not buy carrots when we grocery shopped the previous day. However, I did not have any walnuts in the house either. I searched. So, pound cake it is.

From my French Feasts coffee table-sized cookbook, there is a pound cake recipe.

  • 1 2/3 cups all-purpose flour
  • 1 cup sugar
  • 3/4 cup butter
  • 4 eggs
  • 2 1/2 teaspoons baking powder

The recipe description says this is a basic recipe that can be personalized by adding apples, pears, banana, fruit conserves, etc. As you can see there is no “flavoring” in the recipe. Also there is probably an assumption that the butter is salted. So I add:

  • 1/2 teaspoon lemon extract
  • zest from one very small lemon
  • I forgot to add a pinch of salt

We like lemon glazed pound cake so that was my plan. Then I wondered about adding some raspberry preserves…lemon and raspberry is a nice flavor combo!

  1. Whisk the eggs with the sugar until the mixture is pale and thick. Add the softened butter, sifted flour, and baking powder. So I rarely sift flour anymore. Instead I whisk the two dry ingredients together for about 30 seconds to thoroughly mix.
  2. I lined a 9×5-inch loaf pan with parchment and cooking spray. I poured about 3/4 of the batter into the pan. I then added about 1/4 cup raspberry preserves to the remaining batter. Then, forgetting how to marble a cake, I plopped the purple batter on top and attempted to make a swirl.
  3. Bake in preheated oven 315 F for 45 minutes. In future I will set the oven for 350. I had to leave it in the oven baking for another 15 minutes. But this may be because I added the jam.

I let the cake sit in the pan for about 15 minutes and then took it out and let it cool on a wire rack. I paced paper towels (parchment paper would have been better) under the rack and while it was still warm I glazed it. To make the glaze I added the juice from the small zested lemon to 2/3 cup confectioner’s sugar. That made too much glaze so I poured about 1/2 of that on the warm cake. Then I let it sit to cool a bit more. And then we ate it.

IMG_0236

I served this with some thawed frozen mixed berries and freshly whipped cream. It was yummy. The swirl is evident but the flavor of the raspberry preserves did not come through. The lemon overpowered it. In future, I would add vanilla to the cake itself and more fruit preserves, maybe just dropping the preserve into the batter in the pan for swirling. The outside had a nice crust but the interior texture was not as dense as expected in pound cake. Not a failure! Actually a success!


I made a Green Grape Pie!

Why, might you ask, and what? I had bought one of those supermarket packages of green grapes and found the the quality was not very good for eating fresh. But what should I do with all those grapes? I could throw them all in the compost bucket but that seems like a waste. I found this recipe on the internet and adapted her adaptation for my own pie: Green Grape Pie

I had two refrigerated ready pie crusts in my refrigerator. Sometimes I buy these instead of making my own. I did not have elderberry flower syrup but the rest of the ingredients were all ready. I gathered them all together and baked a pie.

I think there were about 3 pounds of green grapes. I pulled them off the stems. I did not weigh them. It looked like enough for a pie.
1 cup white sugar, plus extra for top crust
1/2 teaspoon freshly ground nutmeg; I had Hubby grate the nutmeg while he was waiting for his Kindle to charge.
1 lemon, juiced; I had just sliced a bit off of a lemon for my tea, so I juiced the rest of it.
1/4 cup elderberry flower syrup; substituted light corn syrup with real Vanilla!
1/4 cup dark honey; my honey was not particularly dark. Actually I combined the corn syrup with the honey to equal 1/4 cup as 1/2 cup sounded like it would be too sweet.
1/4 teaspoon salt; who measures this? It’s a generous pinch.
3 tablespoons cornstarch
2 tablespoons unsalted butter, cut into small pieces

Preheat oven to 425 F. put one pie crust in the pan and put in freezer while making the filling. This is because you will put boiling hot grapes in the crust and you want the crust not to melt.

Put grapes, sugar, nutmeg, lemon juice, and honey/syrup in a large saucepan and heat. This will eventually need to be brought to boil. Before that boils stir in the cornstarch and salt. Stir frequently until it is boiling and thickens.

With slotted spoon remove grapes and place them in the frozen pie crust. Then add a bit of the syrup to fill the pie. I did not. In fact, there seemed to be enough syrup attached to the grapes already. The recipe has said it was a very juicy pie anyway. Dot the grapes with the butter. Place the top crust and pinch the edges together. I used my pie bird so did not need to cut additional slits. Sprinkle the top generously with sugar. Bake for 30 minutes until crust is golden brown.


Looking good! It is supposed to cool completely before serving. This should let the juices set up a bit.

And then we ate a slice. I’m sorry to say that it is “nothing to write home about”. Hubby declared the crust wonderful but the pie “bland”. It was an interesting texture, mushy-like. The flavor probably did need that elderberry flower syrup.

I took the remaining pie to work to see what my coworkers thought. It was declared “interesting” but was not a hit. It was just not appealing. I will not be making this again. Next time I have a bunch of green grapes that are not the best, I will cook them down into a sauce for chicken or pork. I have to admit the sauce idea was Hubby’s first suggestion.